
Create landing page with Elementor from scratch
Do you want to create a landing page with Elementor from scratch for your WordPress website? In our previous article, we described the process to create a landing page with an Elementor pre-built template. If you miss that you can check that out too.
How to create a landing page with Elementor using a pre-built template.
The landing page helps you to generate more traffic by getting your user’s personal info. No matter what type of your business is, a beautiful landing page can make your visitors into potential customers. So here in this article, we will guide you to create a landing page with Elementor from scratch in WordPress.
Create a landing page with Elementor from scratch
When you choose a template for your landing page you can easily customize it and edit the content very easily. You can realign the block and delete or add columns and rows, change the image, audio, video, and color scheme everything very easily and in a very short time.
But when you are trying to create your landing page from scratch then you have spent more time and effort on that as you are creating every element from scratch.
Here you will guide you to create a beautiful landing page from scratch. We will add every single element and content from scratch so that it will be easier for you to understand it properly.
Create the landing page
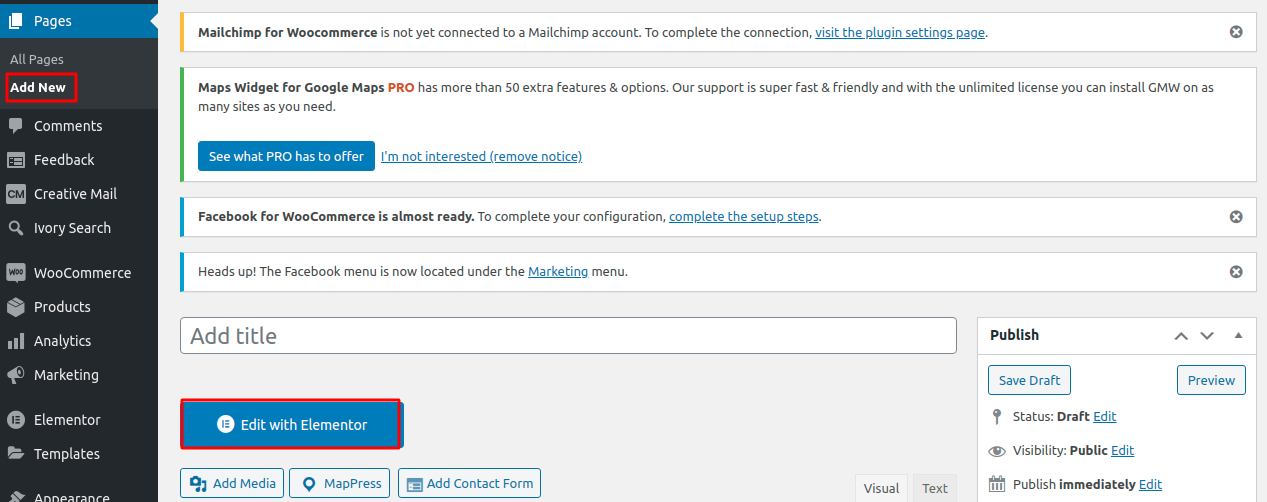
To create the landing page first go to your WordPress dashboard and then go to Pages > Add new. From the add new page click on the Edit with Elementor option.
Elementor page setting option will show up and from the setting option, we can add a title for this page, and then from the Page Layout option select the default option.
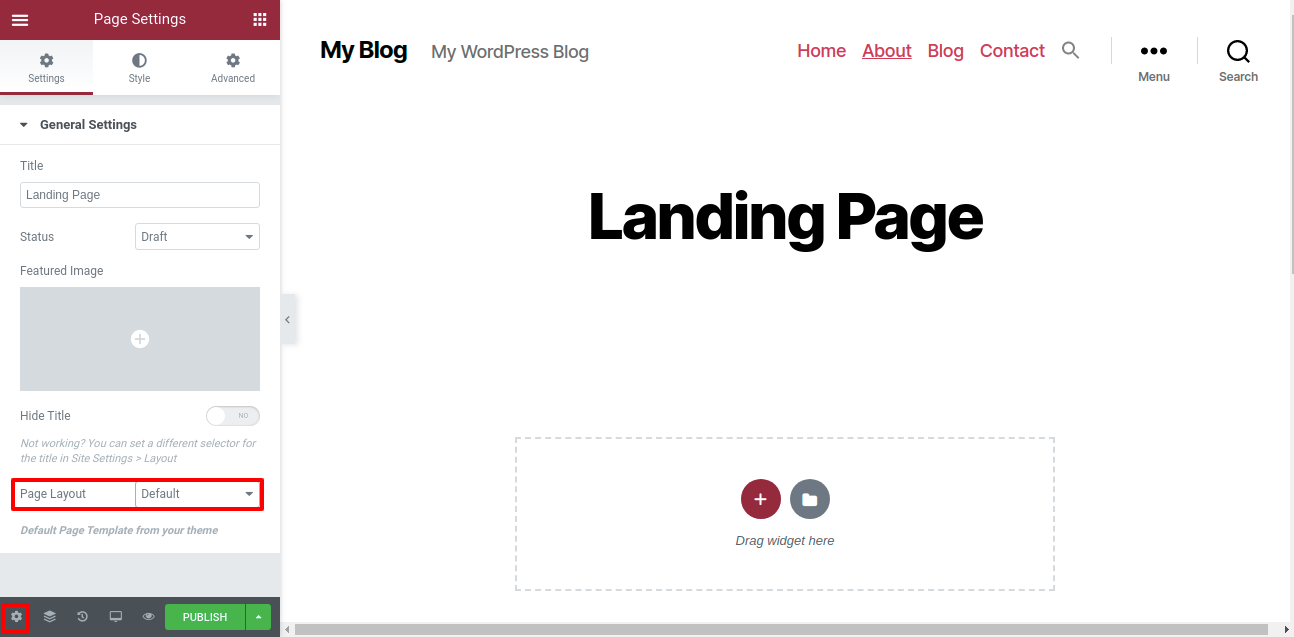
When you crate our landing page using a pre-built template then we choose the page layout as Elementor Canvas. But here we need to select the default option. For the default page layout option, you have the default style like the header, and a footer section will be added to your page.
You can see in the image above that our header sections are added to the landing page. And for the Elemenot canvas layout, it will give you a blank page. No header or footer section will be available for your page in the Elementor Canvas layout. As we are creating our landing page from scratch that’s why we are using the default layout here. If you want you can choose the Elementor Canvas based on your design.
Decide the landing page elements
Before designing our page we need to choose the elements that we include in our page. Our landing page includes:
- Top section
- Services/Features
- About
- Gallery
- Contact Us
Step 1: Setup color, color picker, and fonts
Initially, we need to set up our editor before designing our landing page. We need to set the primary and secondary colors so that when we add any widgets our default color will automatically set. Same thing for default fonts and some other default settings. This will help us to access the global setting quickly.
Step 2: Top Section
Here in this section, we will include :
- beautiful background image
- A heading that describes our brand properly
- Some text about what we do
- A button with a link to a service page or other important pages of our website
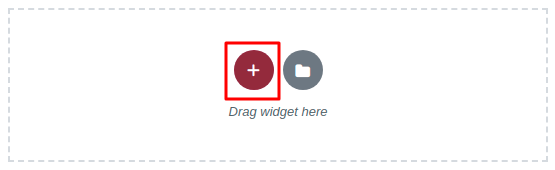
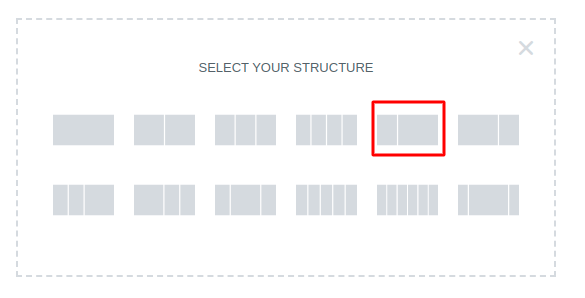
At first, we create our section by clicking on the “+” icon.
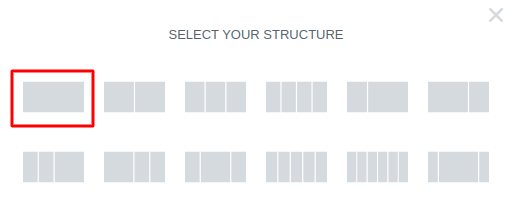
When we click on the “+” icon then a structure option will show up. You need to choose the structure of our section. We can select the column and their structure from this structure option. For our top page, you choose the structure by clicking on it.
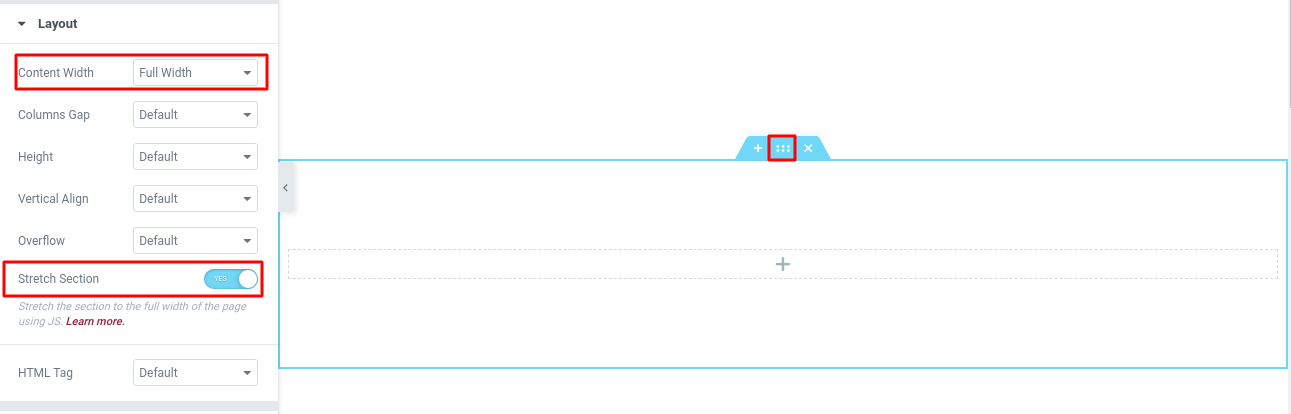
Our section is created. It will look like this. If you want to use the full width then just click on the six dot option and then go to the left dashboard and from the Content width drop-down menu select Full Width and turn on the Stretch Section option.
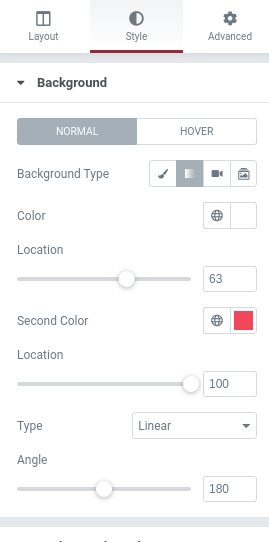
Now we are going to add a background image for our section. To add a background image just click on the section and from the dashboard go to the Style tab and then click on the Background menu. There are 4 types of background options.
- Classic – you can add a single image here.
- Gradient – From the gradient option you can select a color gradient as your background.
- Video – Add a video as background.
- Slide show – Add multiple images as a slide show in the background.
You can choose any of the options from here. You are selecting the classic type as we just set an image in the background. To set an image click on the Choose Image option below and then upload your image and set it.
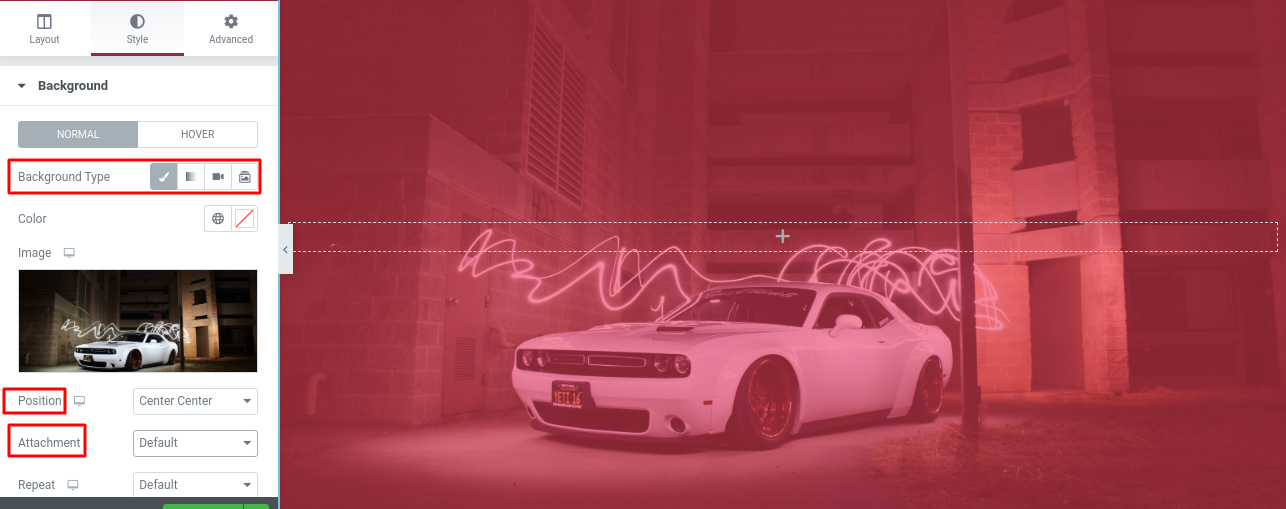
There are also many options you can set the background position from the position menu. You can set the position as center or center left, or right. There are many options available. You can also set the attachment of the background as fixed or scroll. If you fixed the background, when you scroll your image will fix, and the page scroll. But if you select the background scroll, then the image will also scroll with the page.
Background Overlay
From the background overlay option, we can add a color gradient and increase or less the opacity to make our background more attractive.
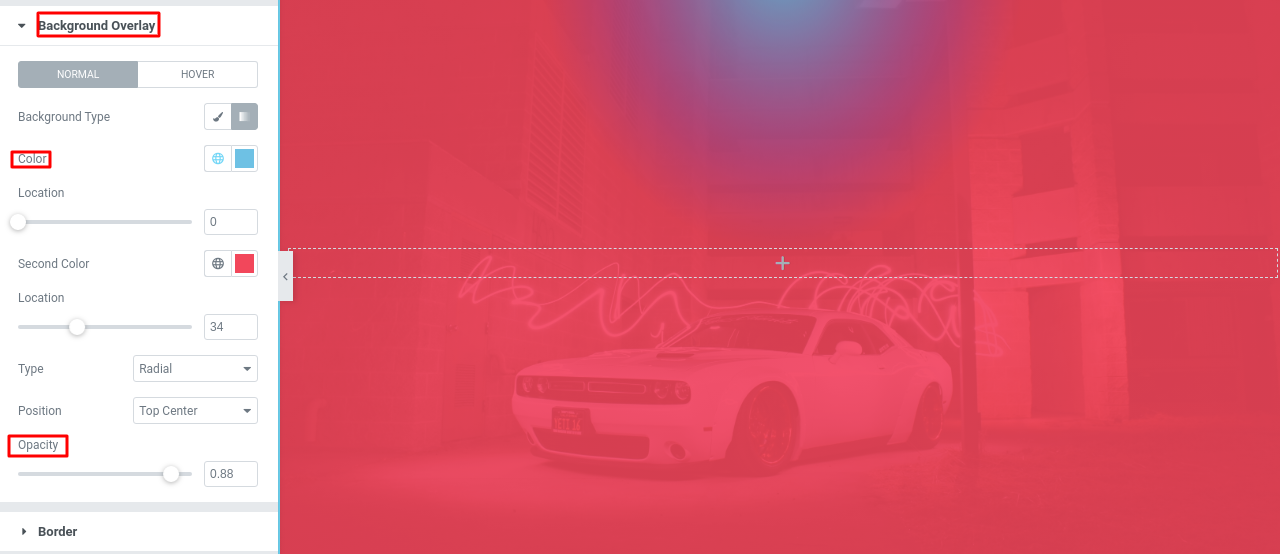
You can easily see the difference between the two backgrounds. Style your background as you want to make it more beautiful
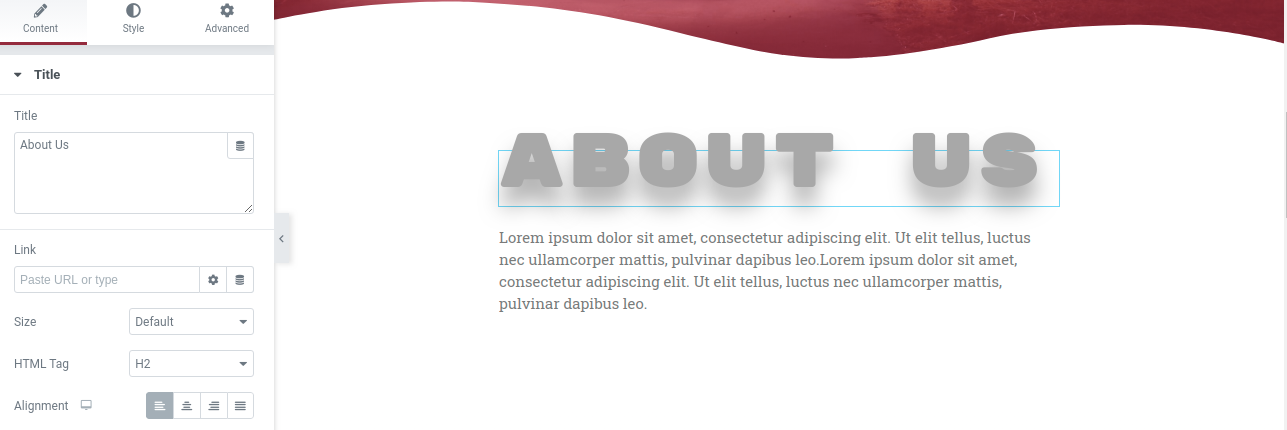
Add heading and text
We set our background properly now the next step is to add a heading about our brand and some description. Elementor offers you so many blocks. You can see all the blocks on the left dashboard. Before adding our heading we just create an inner section in our section. To create an inner section just drag the inner section block and drop it into the section. Now to add our heading we need to drag the heading block and drop it into the inner section. You can set the size, HTML tag, and alignment from the option too.
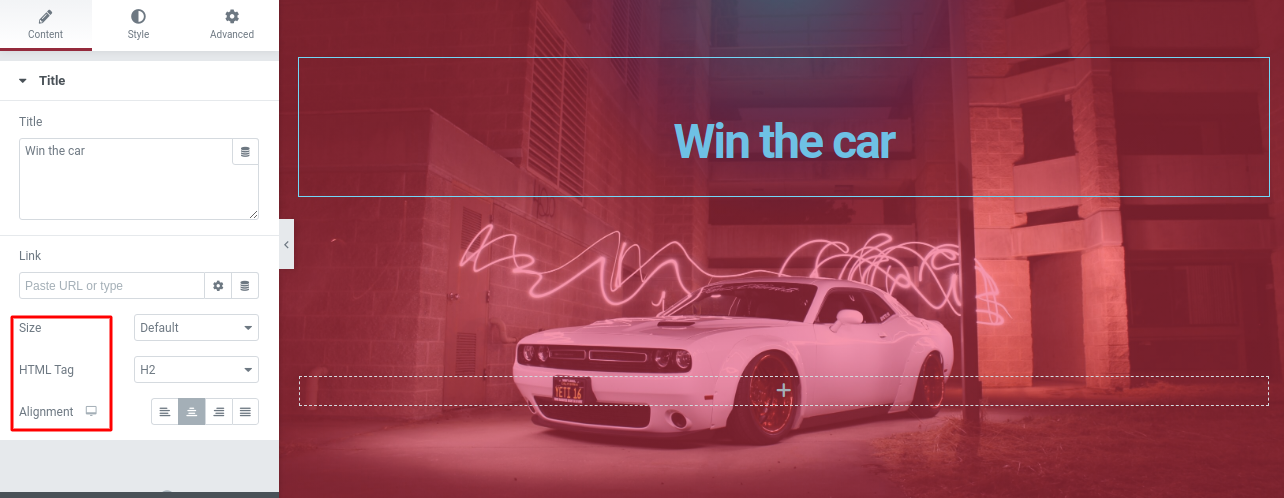
Now click on the Style tab to style our heading. You can set our text color, text shadow, typography, line height, letter spacing, and many more options available.
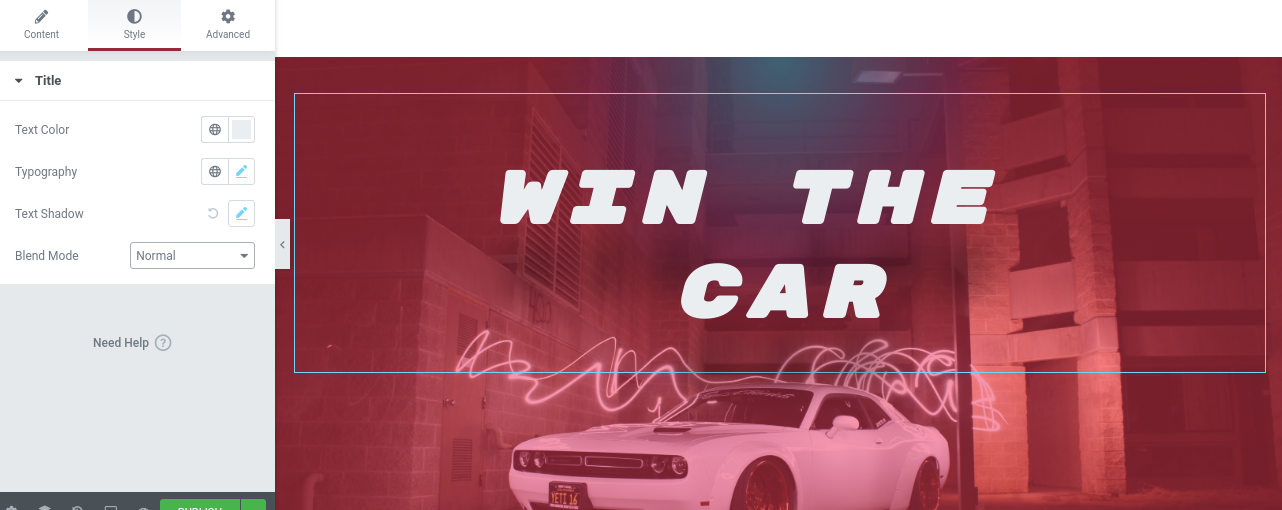
Our heading is ready now it’s time to add a description. To add a description select the Text Editor block drag it and drop it into the inner section. And to add a Button just use the button block. We can style our text editor and button the same way we edit our heading.
from the Shape Divider option, we can add different shades in our section.
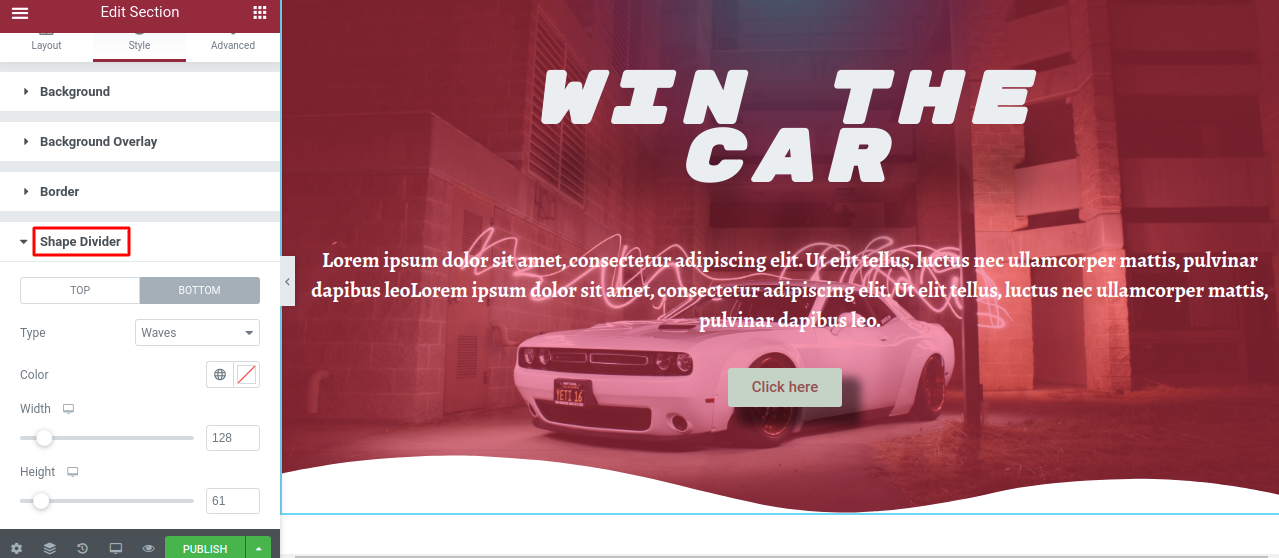
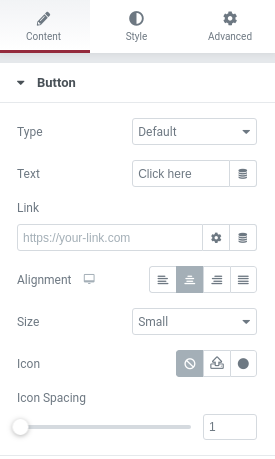
For the button, there are some extra options available. From the content tab, you can set the button type, and add text, link, and alignment.
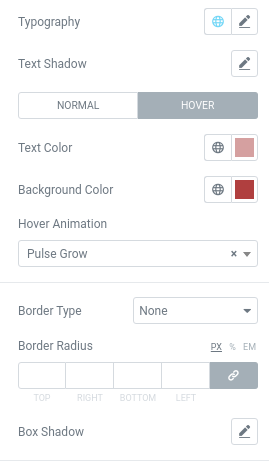
From the style tab, you can set the button typography, text-shadow, and set the hover option.
Our top section is fully complete now you design our about section.
Step 3: About
In the about section, we will use a color gradient in the background and include a heading and a text widgets area. This section will be a one-column section. This style is the same as our top section.
Step 4: Service
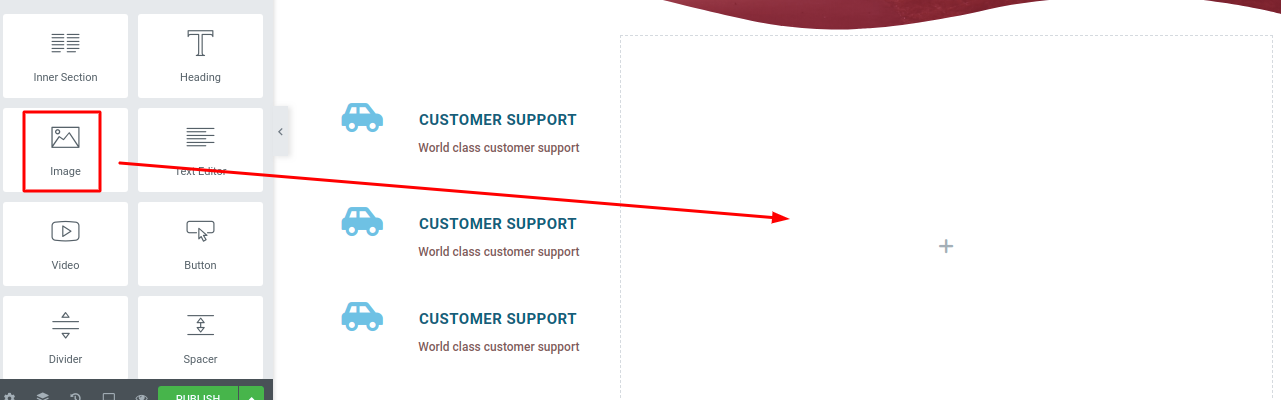
Our service area will be a two-column section. From the right column, we will add a car image and in the left column, we will add some services of our brands.
Click on the “+” icon to add a section and in the select column option select the two columns.
To make the section full width follow the same step we did in our top section. In the left column, we will add 3 different services.
For our services, you will add an icon a heading, and a text editor. So you will take two inner sections. In the first inner section we will ad our icon and in the next one, we add a heading and text.

We can style the heading and text in the same way we did in our top section. After that just duplicate it to add more services. You can duplicate any section by clicking the right button on your mouse and then clicking on the duplicate option.

From the advance tab, you can adjust the inner section by adding the margin and padding.

Our service section is done, now in the right column, we will add our image. To add an image just drag the image block in the section and then from the dashboard upload your image.
After uploading the image from the Style tab you can set some style for your image and from the advance tab use margin and padding to adjust the image.
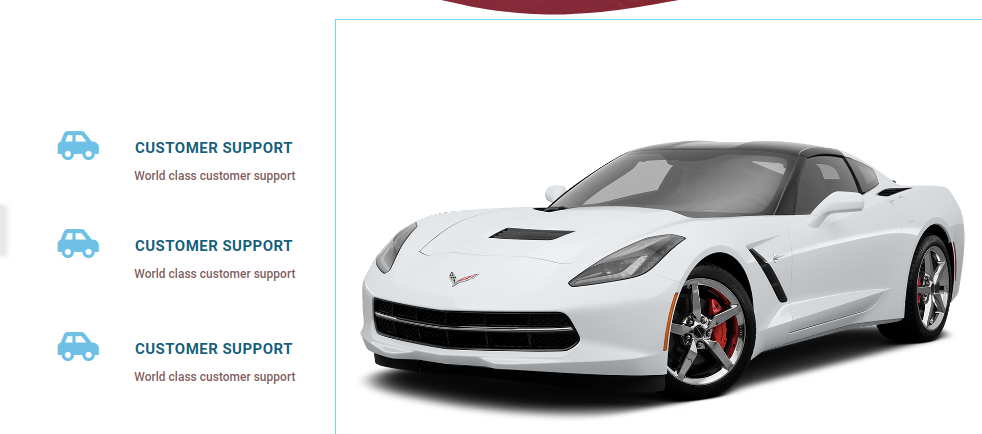
Our section is done now we will add some color gradients in this section. Click on the six dots of the main section and then from the dashboard go to Style > Background > Background Type. Select the background type gradient. Select color and some color gradient style as you want.
From the Background, the Overlay option adds some color overlay and from the Shape Divider option add a shape of your section. After everything is done our service section will look like this.

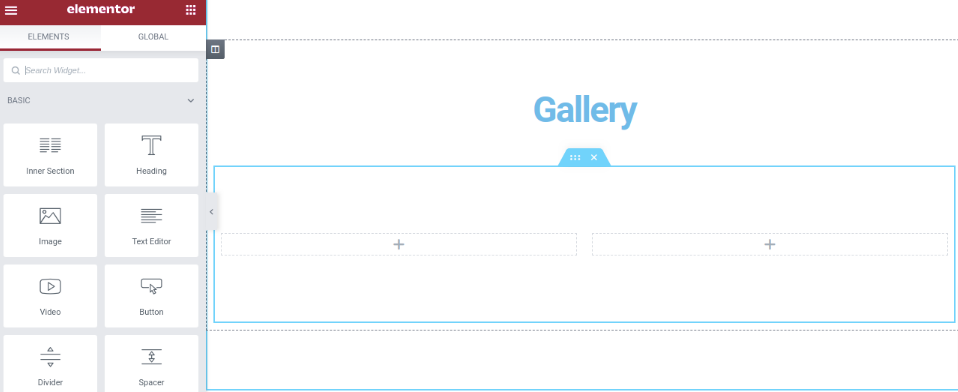
Step 5: Gallery Section
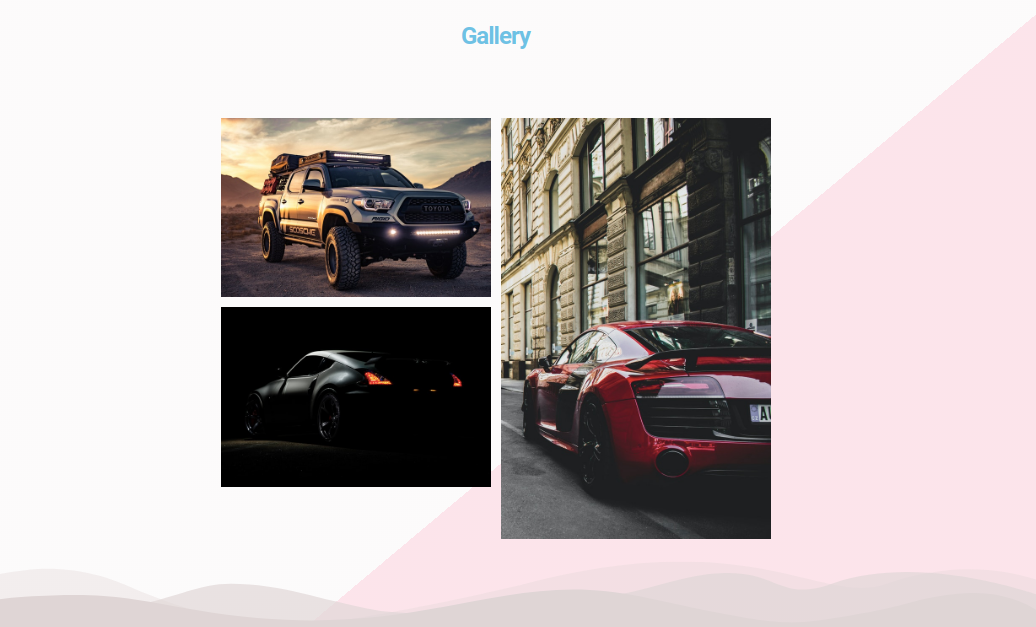
In the gallery section, we will add some images of our brands. For that, we will select a one-column section. In the section, we will take an inner section and give a heading and image block to upload our images. We can duplicate the section to realign our images.
After uploading the images you can style the background. you can add a background image or video to make your gallery section more attractive.
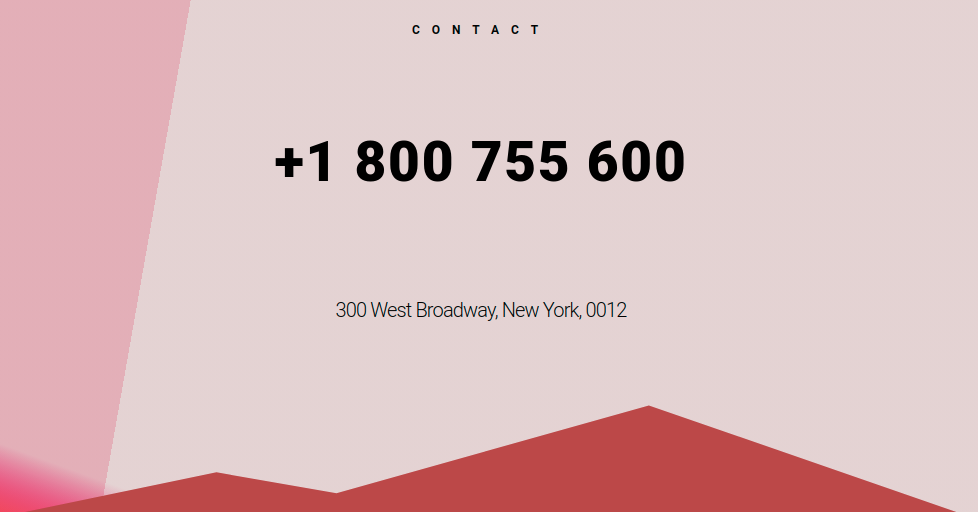
Step 6: Contact Us
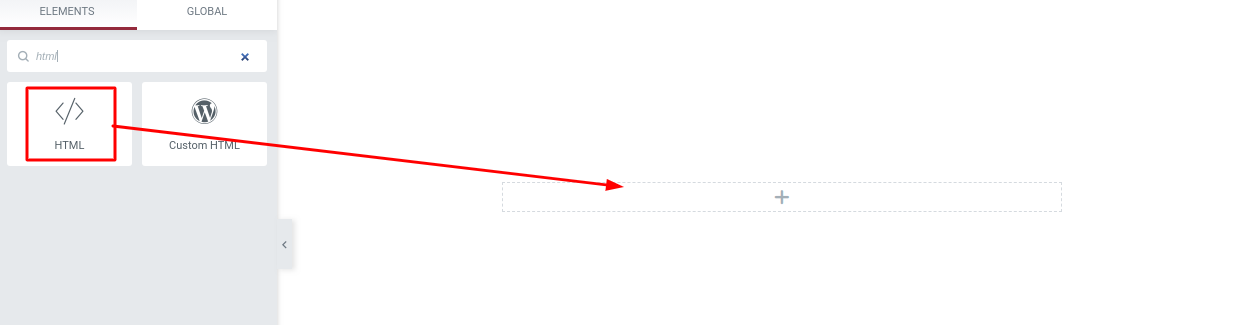
Our last section of this landing page is Contact Us form. Free Elementor doesn’t allow you to add form blocks. You need to use Elementor Pro to use form widgets. But you can add form in another way. Elementor offers you to add custom HTML code. So you can copy a form code and paste it into the section if you want to add a form.
To add custom HTML form code add an inner section and then drag the HTML block on it.
After that use the margin and padding to place the form. And from the Style tab, you can style the section. Or we just can add a number and address of our brand by adding an inner section and style it.
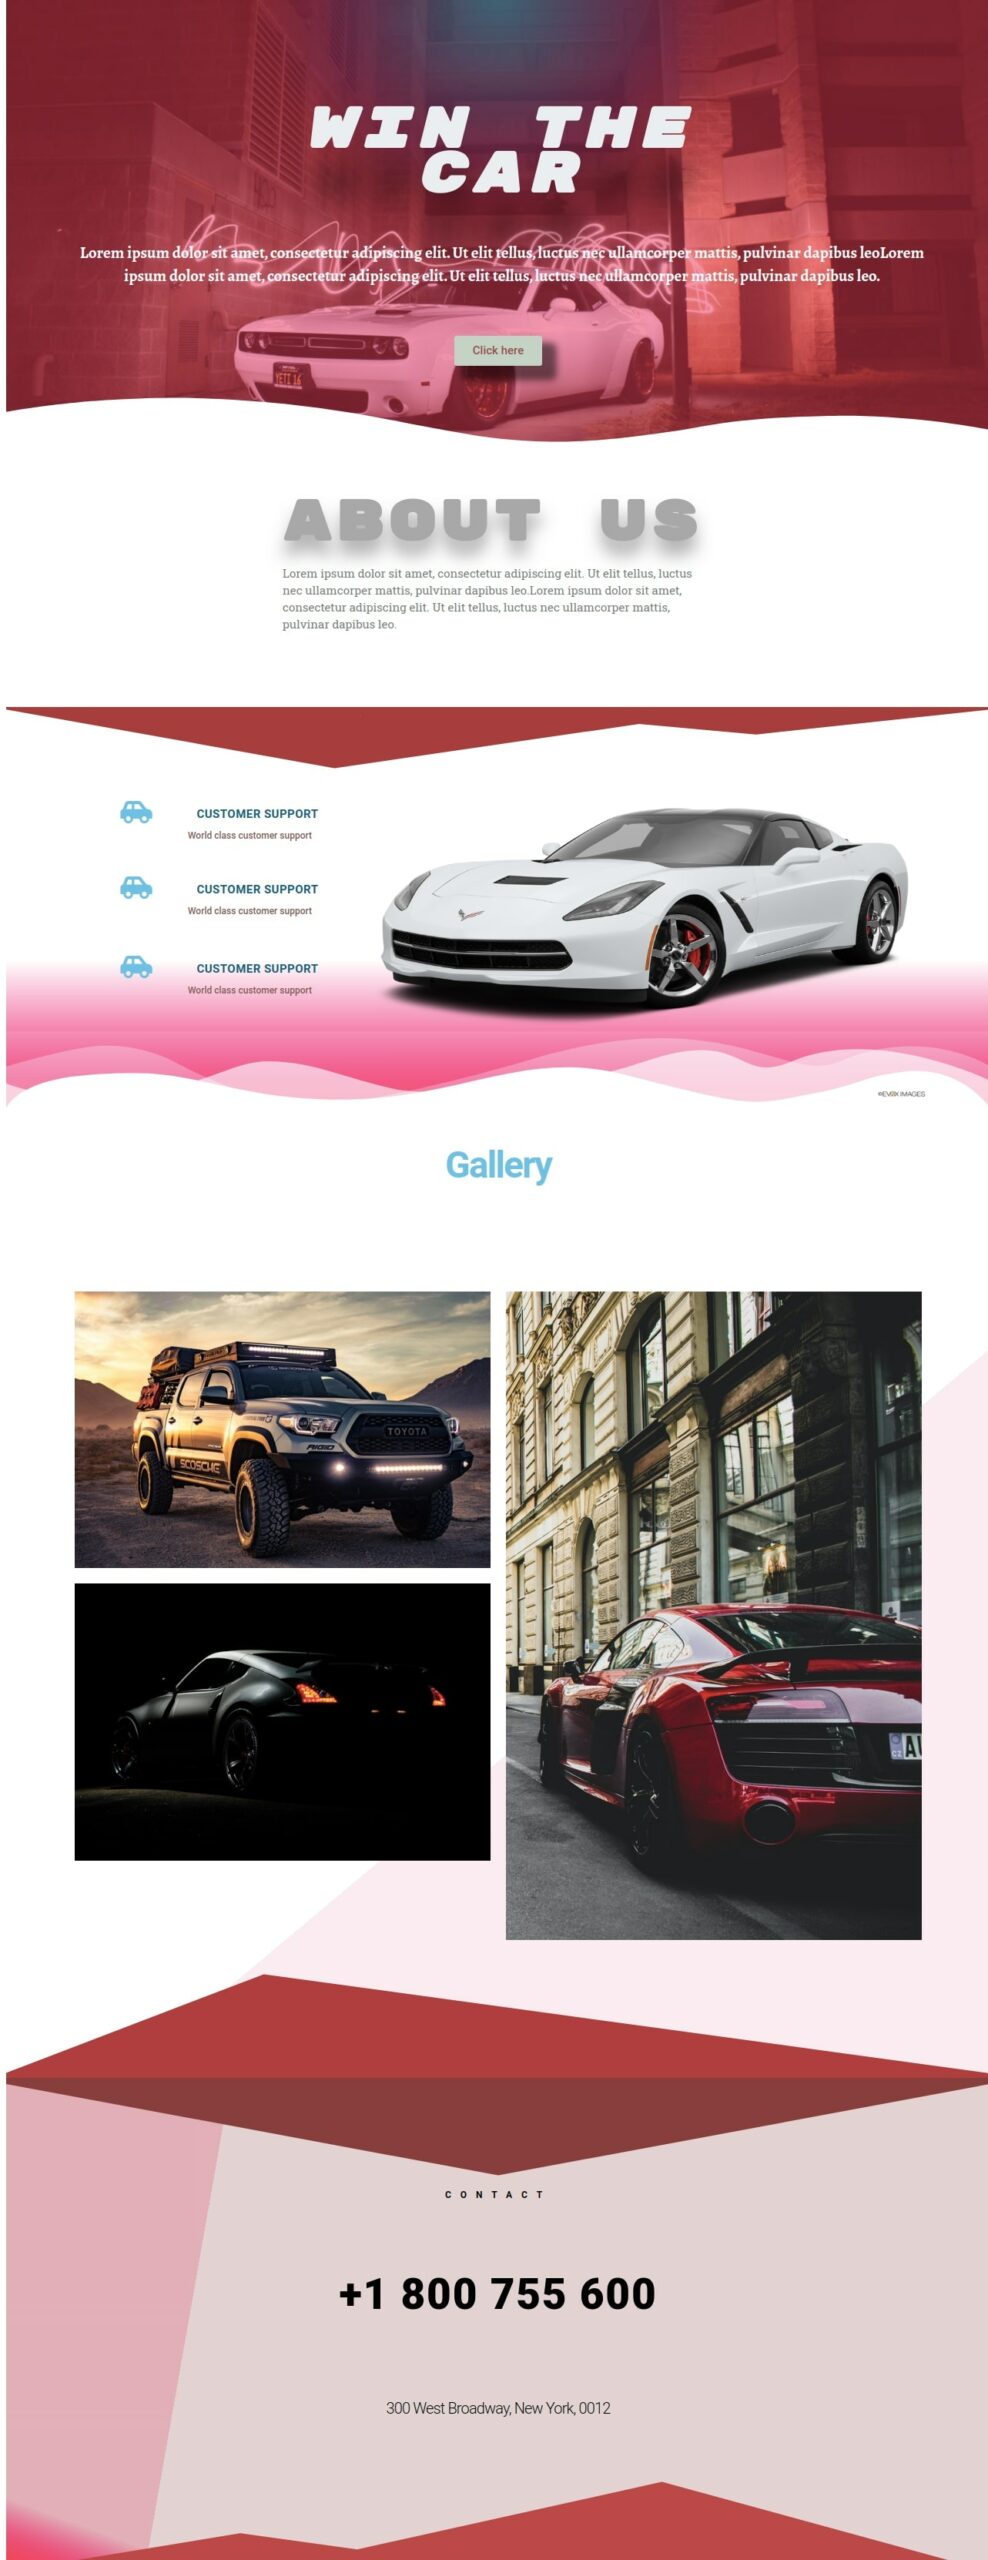
Final Result
Our landing page is done. Now let’s see the result.
We hope this article will help you to create your landing page from scratch.
For better Elementor workflow and productivity you can install the Absolute Addons plugin which makes your website creation experience to the next level. Create a website faster than ever with 250+ ready design blocks. Just download and start making your website in minutes.
Wrapping up
A landing page is very important for a website. You can display your website information in a very creative way on your landing page. Elementor made it easy to create the landing page in a very easy way.
We hope this article will help you to create your own landing page for your website. You can see our other tutorials to learn How to Create a Maintenance Mode Site With Elementor
How to Add Image Masking in Elementor
We hope this article will help you. If you like this article please like our Facebook page to stay connected.


Comments