
How to add custom fields in Elementor
Looking for a way to add custom fields in Elementor?
Adding custom fields to your website is one of the important features offered by WordPress. When you want to create a complex website with dynamic features to your website, custom field features will play a very important role. By default, WordPress offers custom field features but it will not provide additional meta fields.
With the Elementor pro dynamic content option, you can easily add a WordPress custom field. So here in this article, we will show you how to add custom fields in Elementor.
What is WordPress Custom Field
Custom fields are a set of data for additional information to display in your content or blog posts. Based on your website focus you can add the information. You can add the information based on your website focus. For example, if you have a website for the mobile device then you need to display mobile specifications like RAM, ROM, Version, storage, and other information.
Similarly, if you have a movie review site then you need to add many additional fields like genre, summary, audience reaction, and others. Custom fields offer flexibility to sort your information. If any users want to see the movie list based on the rating or genre, then the custom field will easily help you to generate that list.
Based on the website need you need to add additional fields
Add custom fields in Elementor
There are many ways to add a custom field to your WordPress website using Elementor. The easiest way is to use a plugin. There is a lot of plugins that provide custom field features. Here in our tutorial, we are using the Advanced Custom Fields WordPress plugin. There are free and paid versions available for this plugin. The p[aid version offers more flexibility and control.
With the free version, you can add custom fields easily but you need to have the Elementor Pro.
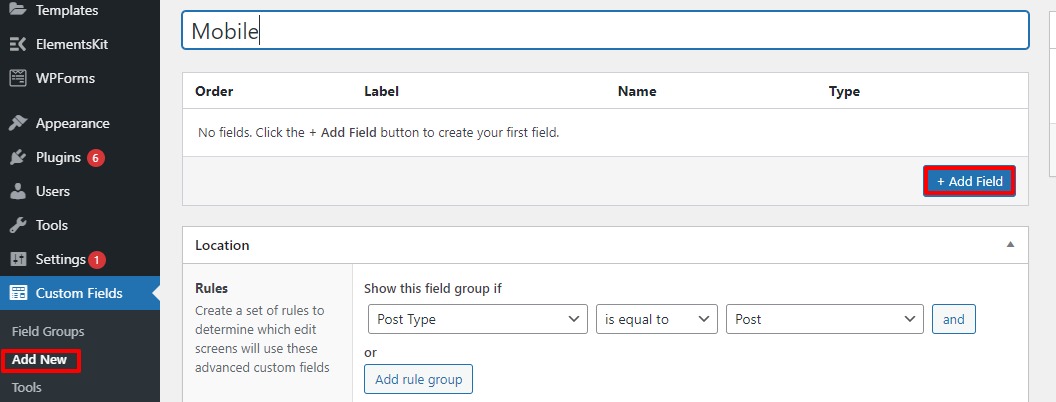
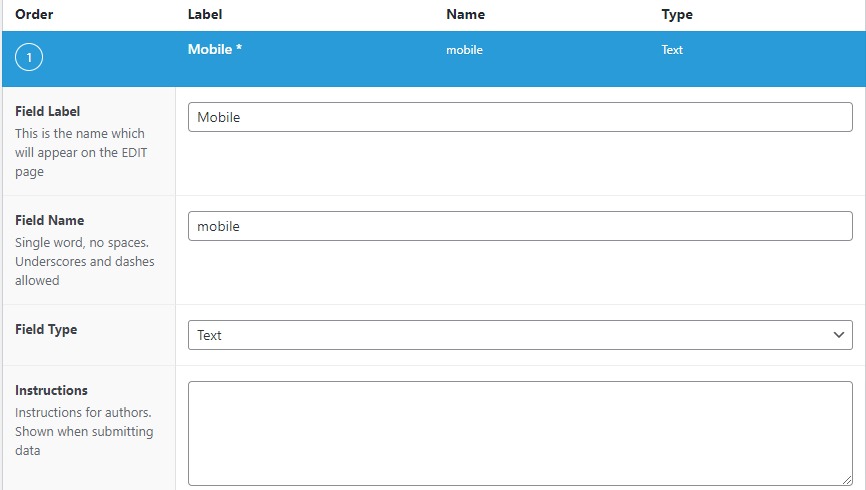
After clicking on the add field button, the field form will open up and you need to add custom field information. Add all the parameters in the form and then click on the add field button again.
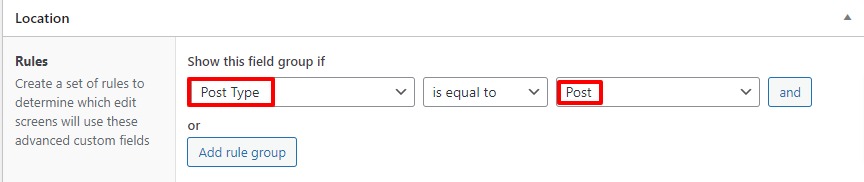
To add more custom fields click on the add field button. After adding the custom field information move on to the location section where you can select where to display the field.
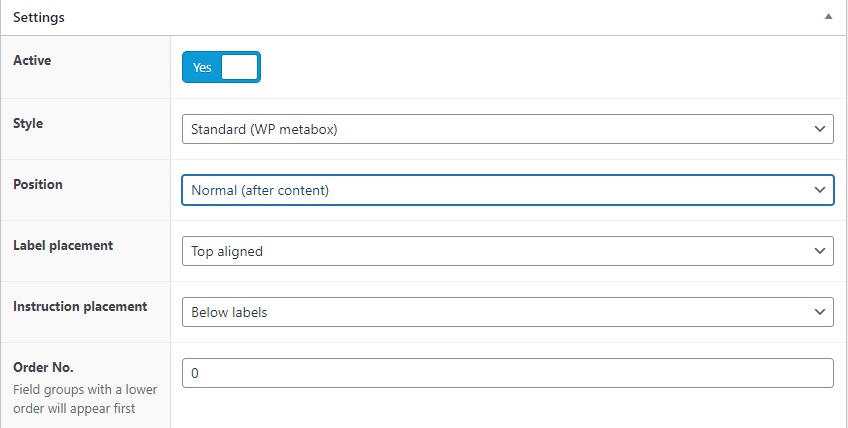
Go to the setting section to set style, position, placements, and others set for your custom field.
When everything is done click on the publish button to activate your newly created custom field.
After publishing your custom field you can again edit the field option from Custom Fields > Field Groups. Here you will see all of your created custom field lists. Just click on the edit option on the custom field you want to edit the information on.
Add custom field to Elementor
Your custom field type is created now you need to add the custom field in your Elementor design. You need to have the Elementor pro add the custom field.
Open up a page with Elementor editor and create a section and add a new widget. Now under the content tab click on the dynamic icon and select Advanced Custom Fields.
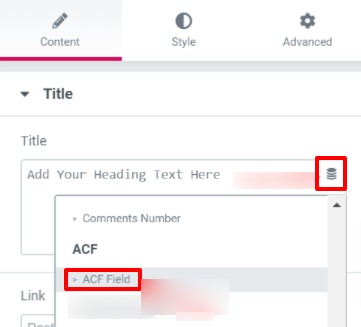
Now it will show you all of your created custom fields list from there you can select the field you want to add.
Wrapping Up
Following the process, you will be able to add a custom field with Elementor. You can also see our other articles to learn How to downgrade Elementor to an older version.
Speed up your workflow with Elementor navigator
We hope this article will help you. If you like this article please like our Facebook page to stay connected.


Comments