
How to create a product grid with Elementor
Do you want to create a product grid with Elementor? In our last article, we showed you the easiest way to add a logo grid to your web pages. So let’s see how you can add a product grid using the Elementor page builder.
When you are running an online shop it is very important to display your products in a way that can easily grab the attention of your customers. You have so many great products in your store but if your customers can’t find them easily or are unable to see the necessary information about the products then they will not go for the next steps. So having great products you lose customers because of poor presentation of products.
To grab the attention of your customers you need to display your products with proper information. If you want to do it manually you need to have good coding knowledge or you need to hire a developer. But using the Elementor page builder and Absolute Addons plugin you can easily add a product grid in your store without a single line of code.
Create a product grid with Elementor
Absolute Addons will enable you to add different widgets with advanced features and functionalities. Some of the widgets are free and some of them are pro. But don’t worry, the product grid widget is a free widget, so you don’t need to spend money. But if you need more layouts and features then you need to activate the pro version.
Install and activate the Absolute Addons plugin and then open up a page where you want to add the product grid. To use the Product Grid widget you need to have the WooCommerce & YITH Woocommerce wishlist plugin installed on your website.
Step 1
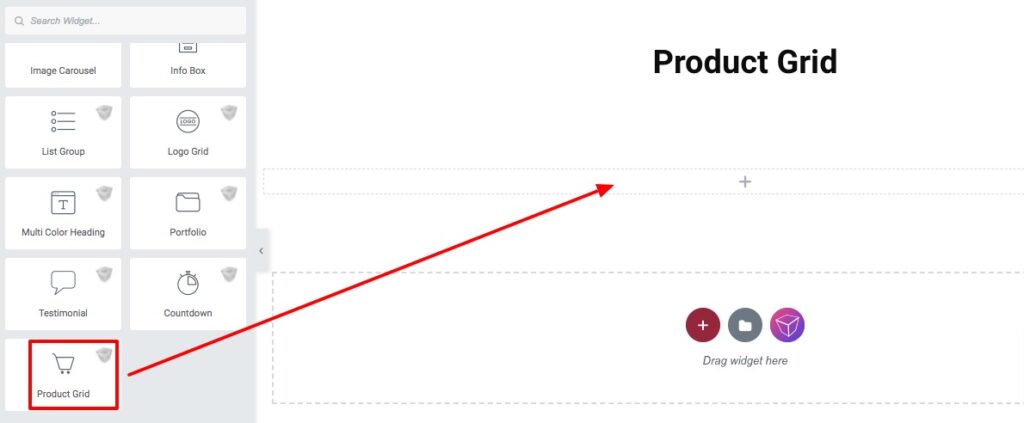
To use our Product Grid widget, first, create a section by clicking on the “+” icon on Elementor, and then from the block section of the left bar search for Product Grid. Drag the Product Grid block and drop it into your created section.
Now from the product grid-style option, you can select any of the styles. There are eleven styles available.
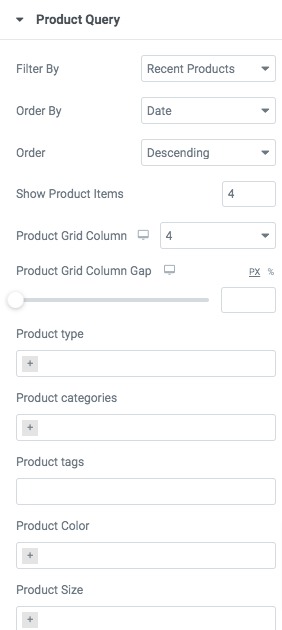
Product Query
From the product query option, you can filter different options to display the product. Set the product number to display, and add a column gap. Then you can display the product by –
- Type
- Categories
- Tags
- Colors
- Size
Product Setting
From the product setting option, you can hide or display the product title, rating, price, and other options.

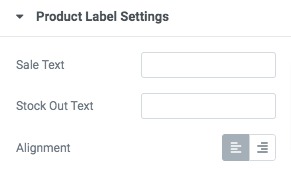
Product Label Setting
Add sale text, stock out text, and alignment.
Move on to the Style tab where you will find different style options.
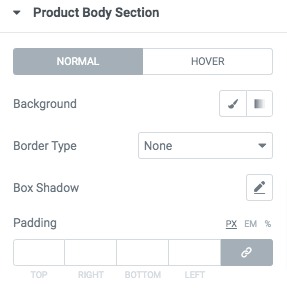
Product body section
Add background, border type, box shadow for both normal and hover conditions.
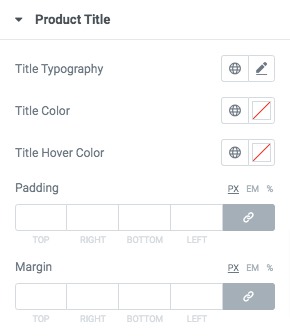
Product Title
Set title typography, title color, title hover color, padding, and margin for product grid title.
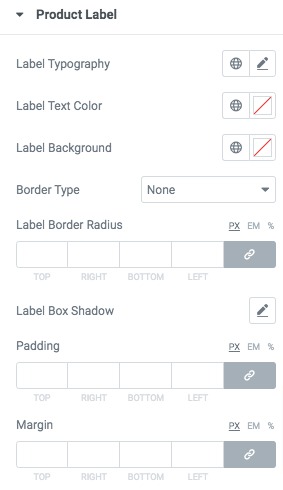
Product Label
Set label typography, label color, background, border, box-shadow, padding, and margin from here.
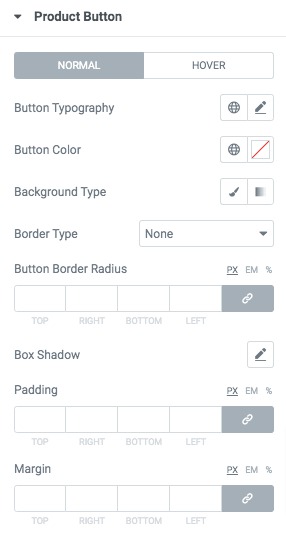
Product Button
Add button typography, color, background, border, box-shadow, padding, and margin for the product button for normal and hover conditions.
Following the same process, you can style the product rating, hover popup, or product not found message option.
That’s it! You have successfully redesigned your product grid section.
Wrapping Up
We hope this article will help you. You can see our other article to learn How to create a multicolor heading with Elementor
How to add an image slider using Elementor free
How to Create a Gradient Button in Elementor
If you like this article please like our Facebook page to stay connected.


