Set Avatar Border Radius on the Post Info Widget in Elementor
Looking for a way to set a border-radius on your avatar while using the Post Info widget in the Elementor page builder? Everyone wants to make a unique website that looks different from others. To make your website stunning, changing the design of the Avatar is a great idea. Most website owners leave Avatar as it is as they think it’s not so important, But you can make it look better which can help you to gain users’ trust and engagement.
Here in this article, we will guide you to the easiest way to set the avatar border-radius on the Post Info widget in Elementor.
Set Avatar Border Radius on the Post Info Widget in Elementor
Here we are using the custom CSS features of Elementor to apply the avatar border-radius. The custom CSS feature is only available in Elementor Pro. So before starting make sure you have upgraded to Elemento Pro.
Open any of the pages with the Elementor editor and drag and drop the Post Info widget from the left settings panel.

By default, you will get the author, date, time, and comments items in the post info widget. You can see the items on the MetaData option under the content tab.
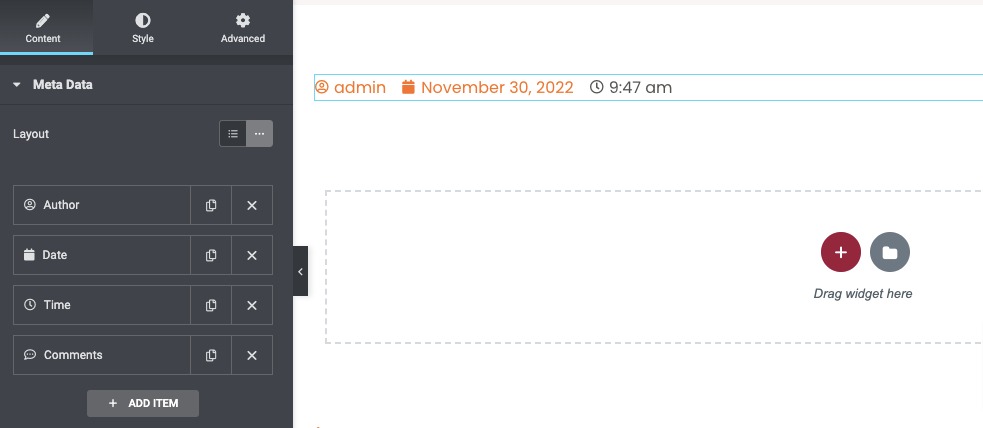
Now click on the Author option and enable the Avatar option and then set the avatar size as you want. When your avatar is ready you can style it up to make it look attractive.
![]()
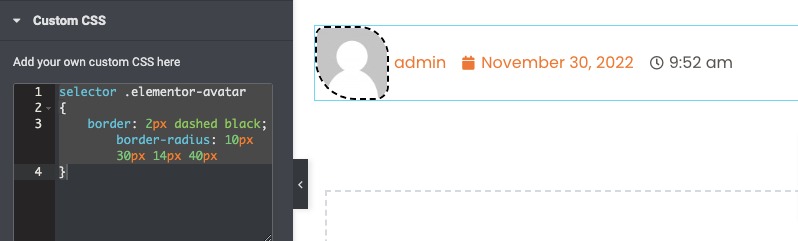
Now to add a border radius on your avatar, navigate to the Advanced tab > Custom CSS field. Here in this field you just need to add some code snippets. Add the following CSS code to set the border-radius.
selector .elementor-avatar

{

border: 2px dashed black; border-radius: 10px 30px 14px 40px

}
This little code will apply a black color border on your avatar image using the .elementor-avatar selector. You can change the color and value as you wish. Just change the color name and add the values in px to match it with your brand.
It applies four values to the image. The first value is for the top-left corner, 2nd value is for the top right, 3rd one is for the bottom right, and the last one is for the bottom-left corner.
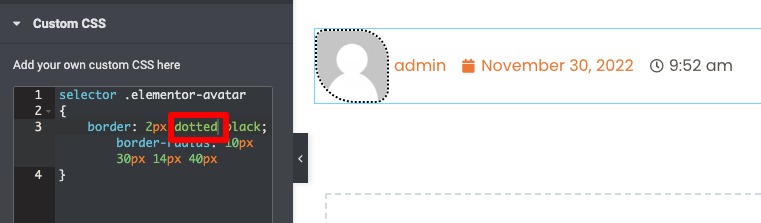
If you want a dotted border then just replace the dashed text with dotted.
For a solid border just change the text to solid.
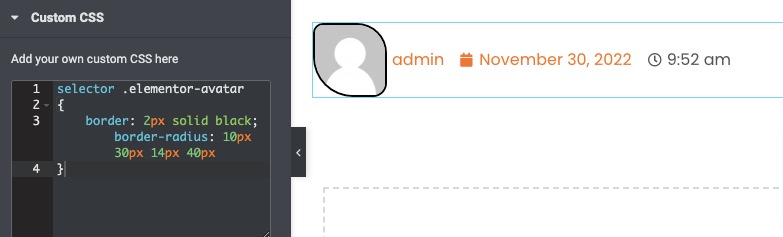
That’s it. Your avatar border-radius is fully ready.
Wrapping Up
Following the process, you will be able to set a border radius while using the post info widget of Elementor. The avatar not only represents yourself but also can gain the trust of your users.
You can see our other articles to learn How to Highlight a Text in the Elementor page builder
How to Add a Vertical Divider in Elementor
How to create an image scroll effect in Elementor
We hope this article will help you. If you like this article please like our Facebook page to stay connected.


Comment