
Create a floating button using Elementor
Interested in crafting a floating button with the Elementor page builder? A floating button is a dynamic element that remains in view across all screen content, serving as a convenient point of action. Website owners often employ such buttons to direct users towards specific tasks, whether it’s subscribing via email or accessing a shop page, among other purposes.
With Elementor, you can effortlessly create a floating button for your web pages through various approaches. In this article, we’ll walk you through the simplest method for achieving this using the Elementor page builder.
Create a Floating Button in Elementor
In this tutorial, we will create our floating button by configuring the z-index. With the free version of Elementor, you can create a floating button for a specific page by following this method. If you wish to implement the floating button throughout your entire site while using the free version of Elementor, you’ll need to manually add the button to each page.
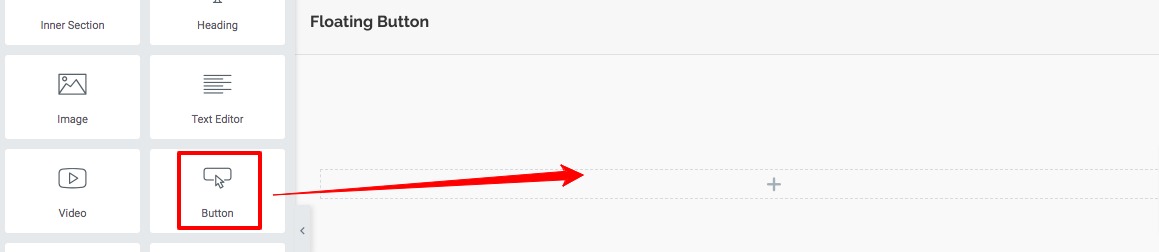
Begin by launching a page in the Elementor editor where you intend to introduce the floating button. You have the option to either create a new page or edit an existing one. Next, simply click on the “+” icon to generate a section, and opt for the single-column layout.

Now from the widget panel add the button widget on your created column.
Now you need to decide the action of the button. In this instance, we are configuring the button to direct users to the shop page. To do this, navigate to the link field and insert the appropriate link to the page. Additionally, utilize the alignment options to define the button’s position, and set the button size to “small.”

With our button configured, the next step is to make it float as the user scrolls down the page. To achieve this effect, navigate to the “Advanced” tab and locate the “Layout” option. Set the width to “Inline (Auto)” and choose “Fixed” for the position. You’ll also have the flexibility to specify your preferred horizontal and vertical orientation and adjust the offset as needed.
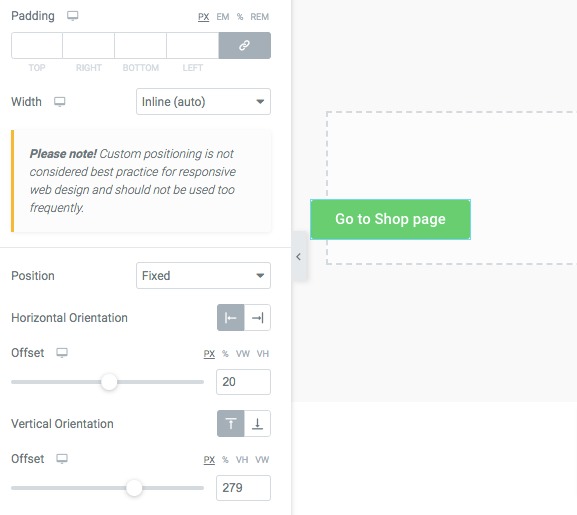
Now you need to set the z-index which makes the button always floatable. In the z-index field add this value 800. It will make the button always floatable.
Wrapping Up
By following these steps, you’ll successfully craft a floating button using the Elementor page builder. For more valuable insights and tutorials, don’t hesitate to explore our other articles, including a guide on how to remove the vertical scroll bar in an Elementor popup.
How to Add Sound Effect on Button with Elementor
How to Add WhatsApp Button in Elementor
We hope this article will help you. If you like this article please like our Facebook page to stay connected.


