
How to Create Age Verification Popup in Elementor
Looking for a way to create an age verification popup on your website using the Elementor page builder? If you are selling products and content that are not suitable for minor users then you can easily add an age verification popup on your website to restrict the users to access the content or products.
Adding an age verification popup using the Elementor is very easy. But the popup feature is only available on Elementor Pro. So you need to upgrade your Elementor to the Pro version.
Create Age Verification Popup in Elementor
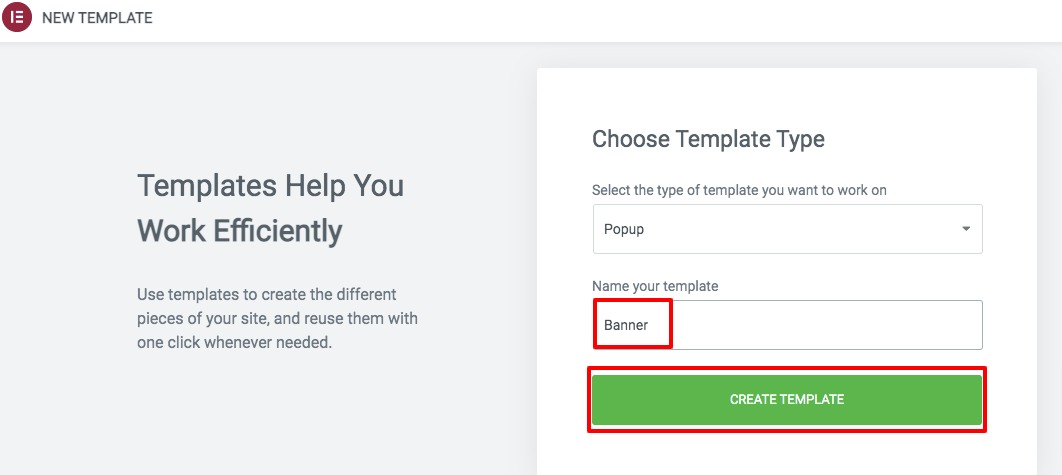
Login to your WordPress website dashboard and navigate to the Templates > Popup option and then click on the Add New button. Now you need to add a name for the popup and then click on the Create Template option.
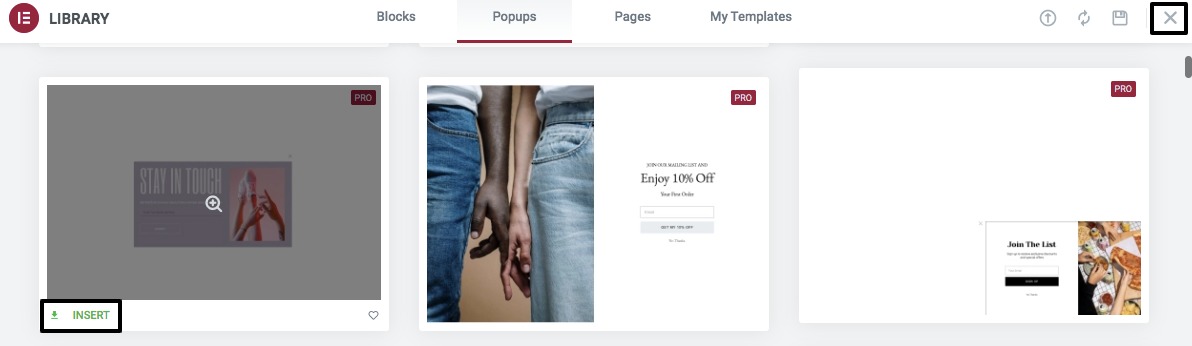
It will show you the premade popup, you just need to click on the Insert button of a template to add. If you don’t want to use a premade template then you can just click on the “X” icon and you can create your popup from scratch.
Now from the Elementor edit panel click on the popup setting icon and from the layout tab apply some changes on the popup. From here you can set the width, height, horizontal or vertical position, overlay, and close button. You can also set the entrance and exit animation too for your popup.
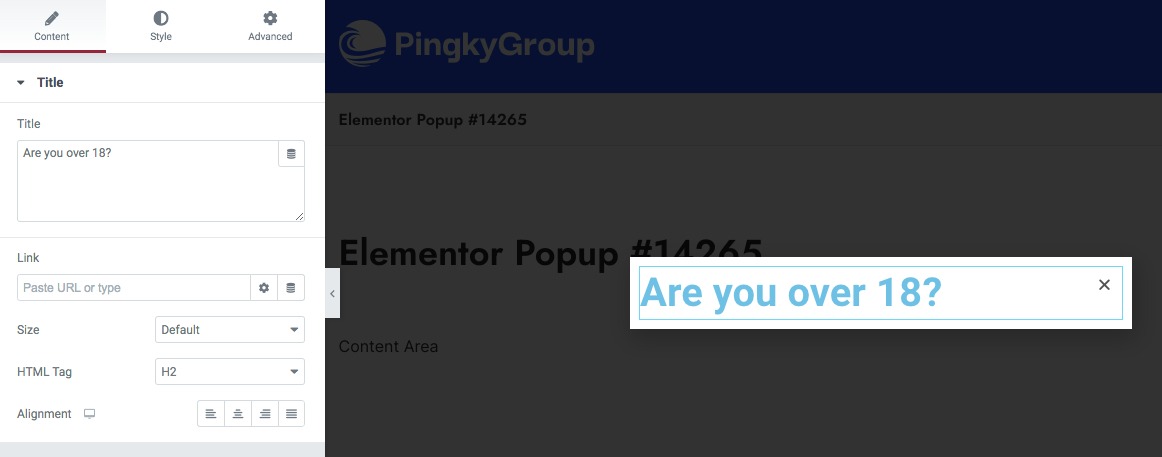
Now move on to the style tab where you can set the background type, border type, border radius, and box shadow. Now you need to add content to your popup. You can add your own content to display. First, add the Heading widget to the section and add some text to it. Style the text from the style tab.
If you want to add more text then you can drag and drop the text editor too. When you are done with your text you need to add the first button to the popup. Drag and drop the button widget under the header text. From the button setting set the button type, add button text as yes, add the check icon, and set the alignment as center.

Now from the style tab set the button typography, text-shadow hover effect, border radius, and others. Now you need to add the second button. Similarly, drag and drop the button widget under the first button and add the text as “No”. Set the alignment as center, add a related icon, and set the icon position as after.
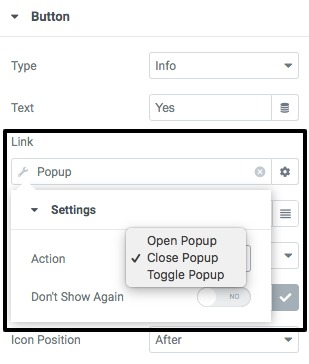
Now you need to aim at the icon. For the YES when someone clicks on it the popup will close and the user can browse the website. To set this click on the first icon and from the link field click on the dynamic tags option and select popup.
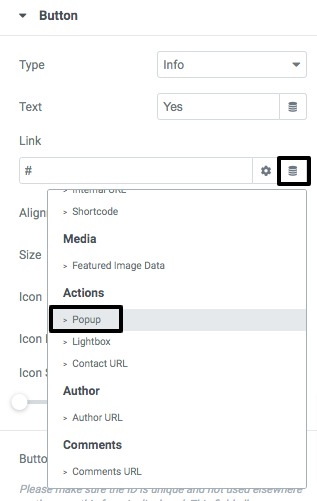
After selecting the popup click on the Action option and choose Close Popup.
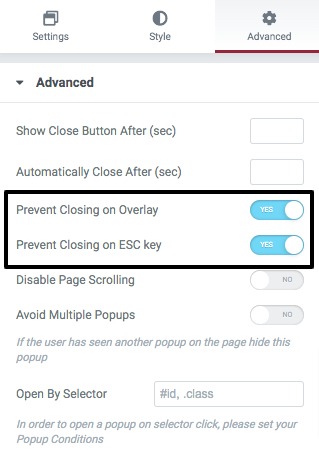
For the “No” button add a related link so that users can navigate to the link you provide when they click on it. Now go back to the popup settings pane and enable the Prevent Clicking on Overlay and Prevent Clicking on ESC features.
When you are done click on the Publish button.
Apply the age verification popup to a page
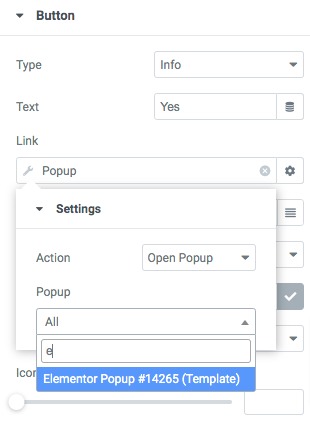
After completing your popup now you need to apply the popup on your website pages. If you want to add the popup before purchasing an item then you can set the popup to the Buy Now button. For this click on the button and from the link, field clicks on the Dynamic Tags and choose popup. Then from the Action button set Open Popup and choose the popup you just created.
This will open the popup when someone clicks on the Buy Now button. If the user clicks on the Yes button the product will be downloaded.
Wrapping Up
Following the process, you will be able to create an age verification popup on your WordPress website using the Elementor page builder. You can see our other articles to learn How to Remove Vertical Scroll Bar in an Elementor Popup
How to create a custom WooCommerce Cart page
How To Install New Fonts in Elementor
We hope this article will help you to make the website responsive with Elementor. If you like this article please like our Facebook page to stay connected.


