
How to Use The Table of Content Widget of Elementor
Looking for a way to add the Table of the Content widget to your Elementor website? You can easily improve your website navigation using the table of content. A table of content can also improve the SEO of your website too. A table of content can be used in different places on your websites like landing pages, blog pages, and others.
The Elementor page builder has the Table of a Content widget which you can use to make it easier for your reader to navigate your content. So here in this article, we will guide you to use the Table Of Content widget of Elementor.
Use The Table of Content Widget of Elementor
The Table of Content widget is available on Elementor Pro, so make sure that you have upgraded to Elementor Pro before using the table of content widget. After enabling Elementor Pro open up a page with Elementor editor where you want to add the table of content. Elementor Table of Content widget will automatically generate its contents based on the hierarchy of heading tags. So before using the table of content on your post or pages, it should have headings on it.
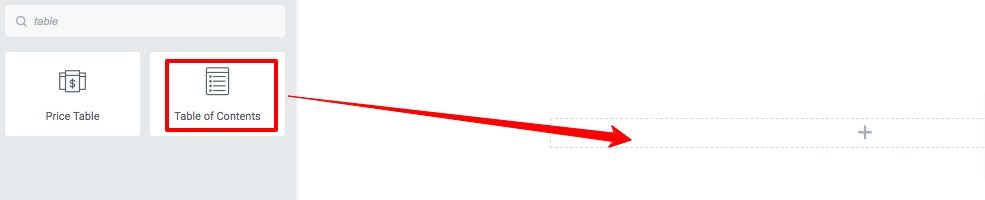
Now click on the “+” icon to create a section and then choose your column.

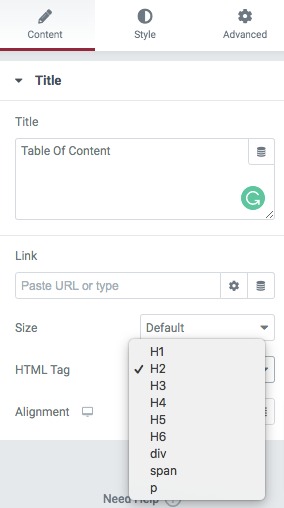
Now add the Heading widget and set the HTML tag for your heading.
After adding the heading now add the Table Of Content widget anywhere you want.
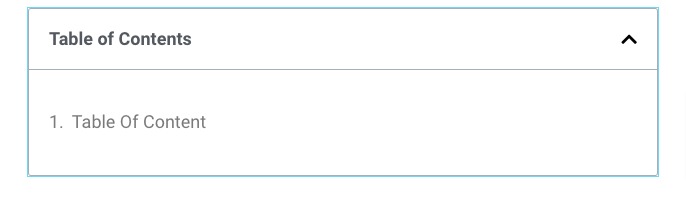
It will automatically generate all the headings of the page under the table of content.
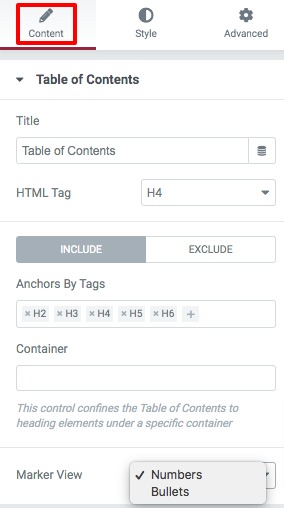
Now on the content tab from the edit dashboard, you can add the title for the table of content. After that, you can include and exclude the HTML tag to add to the table of content. Then you can add the container that controls the Table of Contents to heading elements under a specific container. After that, you can set the marker view as a number or icon.
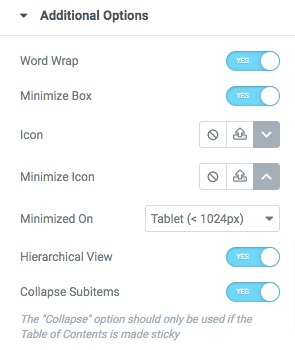
Go to the Additional Information menu to enable or disable the Word-Wrap & Minimize Box feature. Then you can select the minimize icon. At last, you can enable the Collapse Subitems features but the “Collapse” option should only be used in the Table of Contents is made sticky.
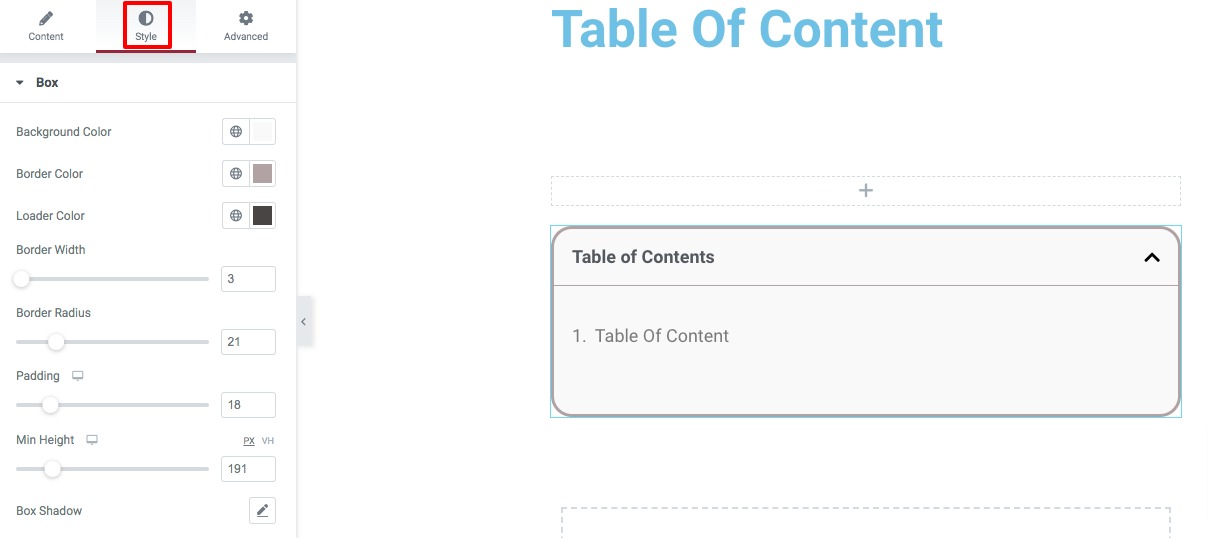
Now move on to the Style tab to style up the table of the content section. Under the Box menu, you can set the background color, border color, and loader color. Then you can set the border width, border radius, padding, and height.
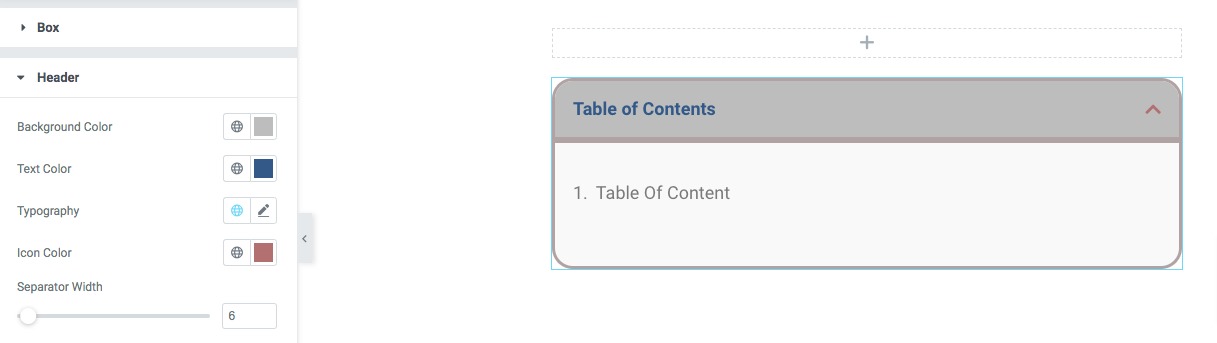
From the Header option, you can set the background color, text color, typography, and icon color of the heading area. You can also set the Separator width too.
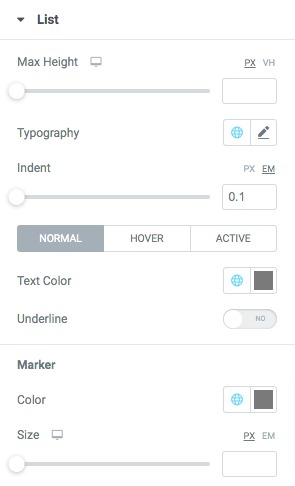
Go to the List option from there you can set the max height, typography, and indent of the list item. After that you can set the text color, marker color & size for normal, hover, and active conditions.
That’s it! Your table of content is ready to use.
Wrapping Up
Following the process, you will be able to add a table of content to your website using the Elementor page builder. You can see our other articles to learn How to Create an Image Scroll Effect on Hover in Elementor
How to Add a Link to a Column in Elementor
How to create a custom WooCommerce Cart page
We hope this article will help you. If you like this article please like our Facebook page to stay connected.


