How to Create Image Sequence Animation On Scroll in Elementor
Looking for a way to add image sequence animation on scroll in the Elementor page builder. Animation on scroll is a great way to engage your users and most of the popular websites like Apple and others use this feature on their websites.
Here in this article, we will guide you to the easiest way to add an eye catchy and engaging Animation on Scroll Sequence effect using the Elementor page builder.
Add image sequence animation on scroll in Elementor
The Pro version of Elemento offers you different animation and motion effects features to make your website more dynamic. But it doesn’t have the image sequence on the scroll feature. So here we are using the Scrollsequence WordPress plugin to make a cinematic image sequence when someone scrolls the website.
There is a free version of this plugin available in the WordPress plugin directory, which let you have all the basic features and functionalities. For advanced features and options, there is a pro version too for this plugin.
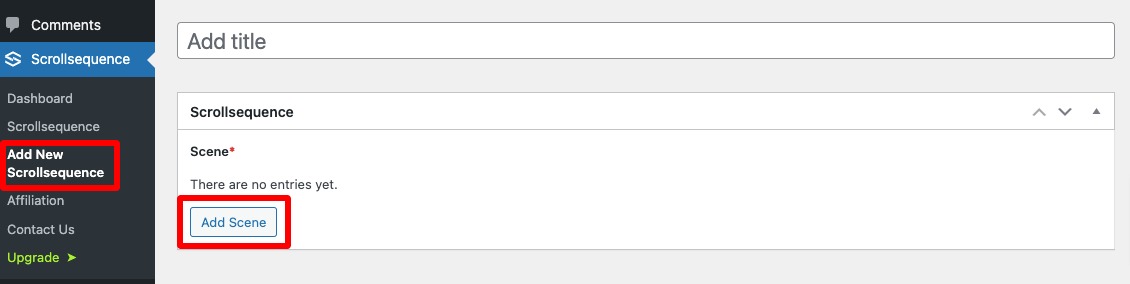
Install and activate the plugin on your website and navigate to Scrollsequence > Add New Scollsequence page. From this page, you can create your first sequence. But before that, you have to understand how the sequence works.
For each animation, you need to adjust one or more scenes and each scene contains multiple images. Based on your images the plugin will generate the sequence. A scene is a complete animation cycle. When you add multiple scenes, users will finish the first scene and then they will see the second scene.
So to create a scene you need sequence images. Most users want images from a video. There are different tools available that help you to get images from a video. You can see the Scrollsequence documentation page to get an idea about the free tools.
When your images are ready, now it’s time to create your first scene. Click on the Add Scene and then upload your images.
To get a perfect animation the developer encourages users to upload 50-100 images so that the animation looks good. Also, you need to make sure that your uploaded images are in the right order. Use the sort option if they are not in the right order.

If you want to add another scene click on the “+” icon. After completing the image upload and sorting, move on to the next steps.
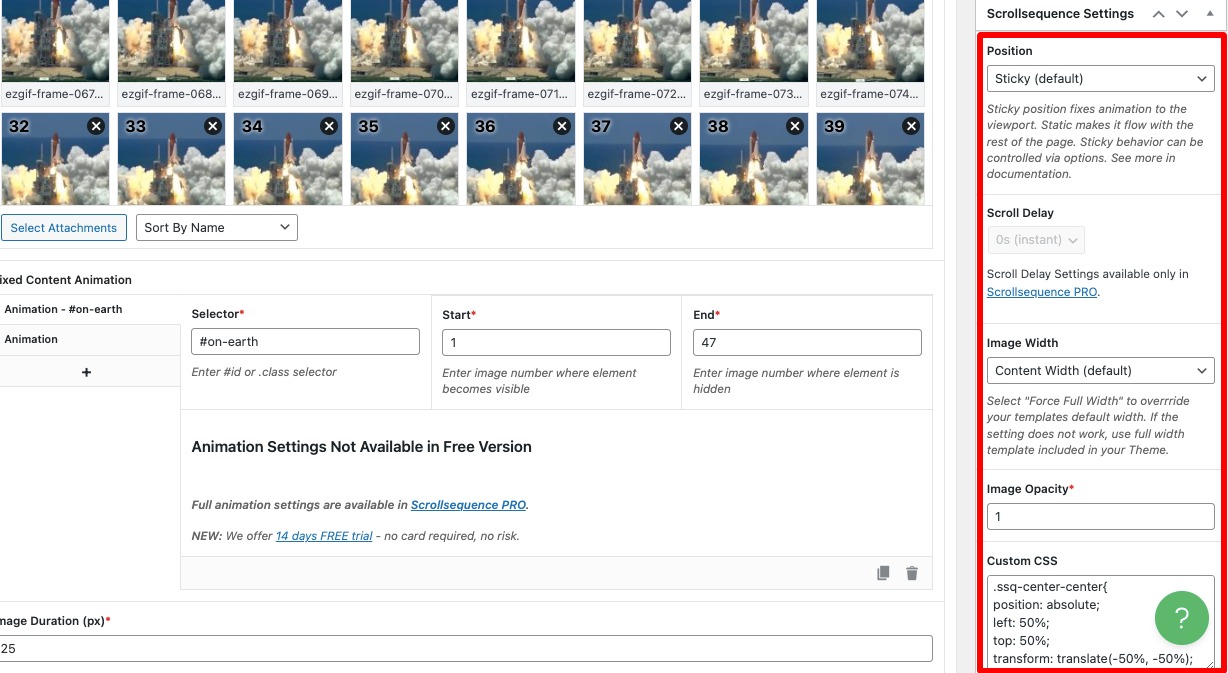
Fixed Content Animation
You need to add animation rules in the fixed content animation option. First, you need to add the CSS selectors and then based on those CSS selectors choose the timing and image when the animation will show up.
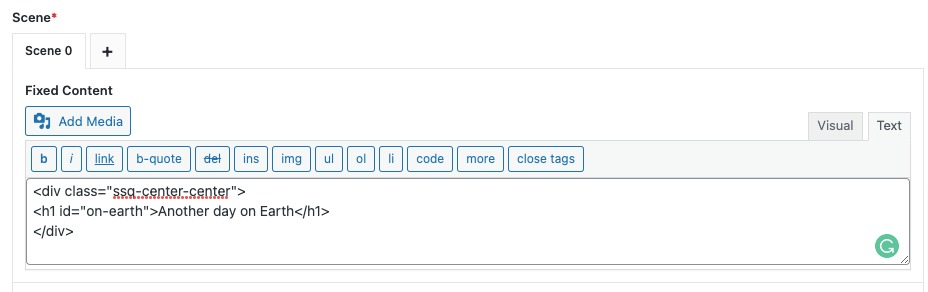
Now in the Fixed Content Animation field, add the selector and the enter image number where the element becomes visible. After that enter the image number where the element is hidden.

You can also set the image duration to set how far the images are apart.
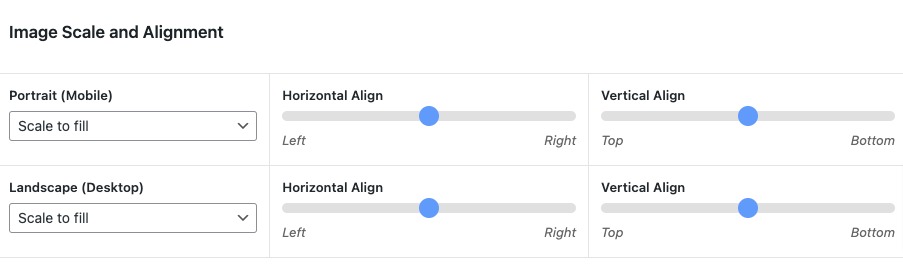
Image Scale and Alignment
Here in the Image Scale and Alignment option, you can set the portrait and landscape options for mobile and desktop. You can also set horizontal and vertical alignment for both mobile and desktop too.
Configure other settings
Creating scenes and animation configuration is the most important thing to create an image sequence. But the plugin also offers some features for basic configuration. From the Scrollsequence setting option at the right panel, you can set the image position, scroll delay, image width, and image opacity. You can also add custom CSS too.
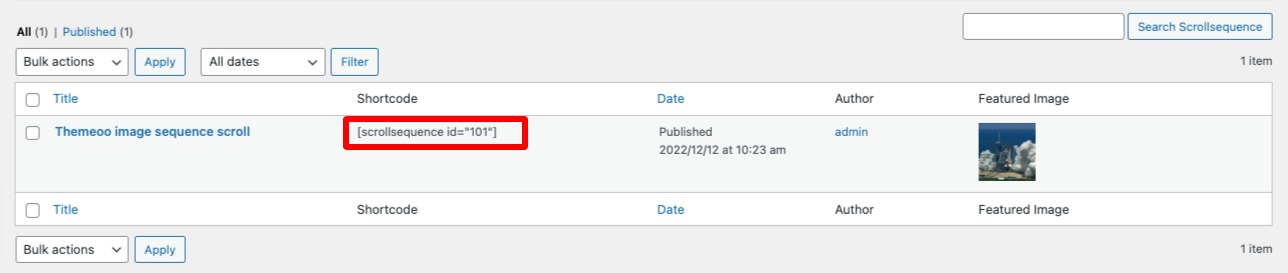
When you are done click on the Publish button to publish the animation. Now navigate to the Scrollsequence page and copy the shortcode to use it anywhere on your website.
Add the scroll animation to Elementor
When your animation is ready you need to add it on Elementor. You can add the animation on an existing page or you can create a new design for the animation too.
Open up the page with the Elementor editor and add the shortcode widget from the widget panel.

Now in the shortcode field add the shortcode of the Scrollscene animation you just created. The animation will be added to the page instantly.
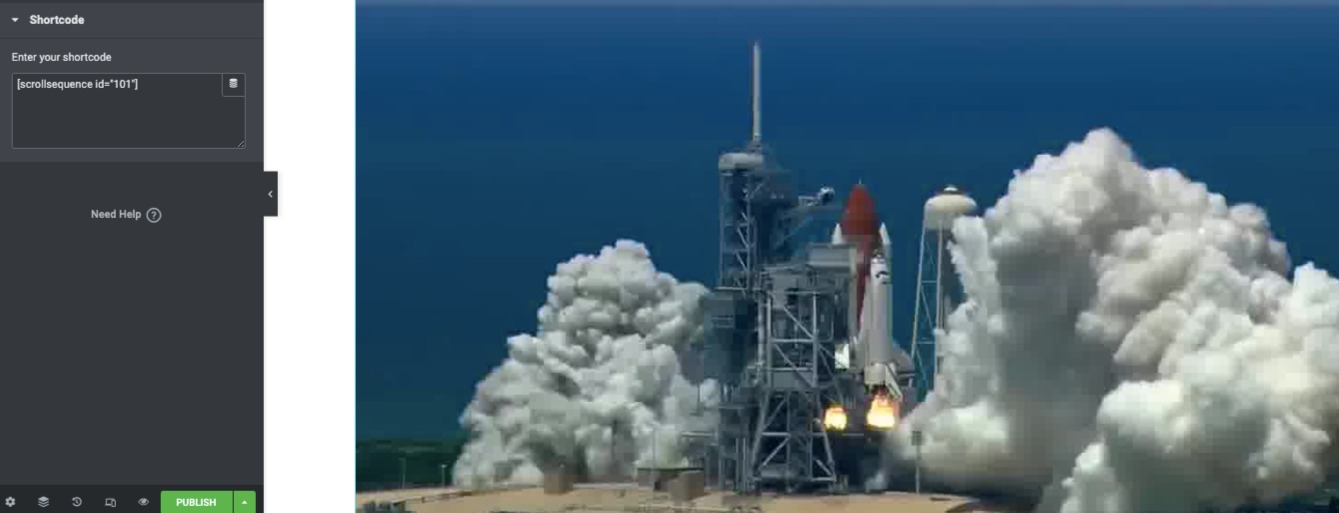
When you are done click on Publish or Update button to save the changes. Now let’s take a look at what our animation looks like –
Wrapping Up
Following the process, you will be able to create an Image Sequence On Scroll in Elementor. You can see our other articles to learn How to Highlight a Text in the Elementor page builder
How to Set Custom Size on Elementor Button Icon
How to change the video play icon in Elementor
We hope this article will help you. If you like this article please like our Facebook page to stay connected and subscribe to our newsletter to get exciting articles.


