
How to create a Portfolio with Elementor
Looking for a way to create a portfolio with Elementor? The portfolio section is a very important part of a website that helps you to show your works and services. Whatever your business or services are you need to show them on your portfolio to attract users. If you want to impress your users, a portfolio section will help you in this process.
Creating a portfolio section in your WordPress website is very easy when you have the right tools. There are solutions like Elementor and Absolute Addons which offer you advanced features and functionalities to create a beautiful portfolio section. Elementor has its own portfolio widget but it offers you to create a normal portfolio with limited features. If you want advanced features and presets then Absolute Addons is the right solution for you.
Things you need to create a restaurant menu
- Elementor – To customize your website without coding you need to install and activate the Elementor website builder plugin.
- Absolute Addons – The portfolio widget is available on the Absolute Addons free plugin. So you need to install and activate the plugin.
Create a Portfolio with Elementor
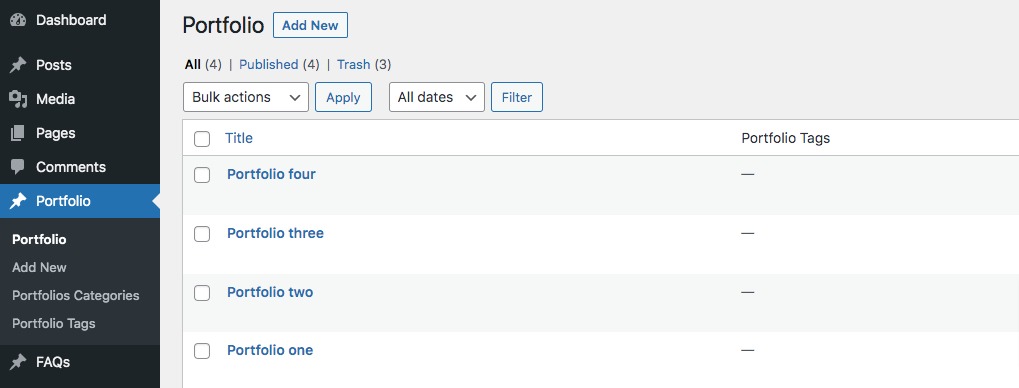
To create a portfolio section on your website first, install and active the Absolute Addons plugin. After activating the plugin go to Portfolio > Add New and then add your portfolio items there with category.
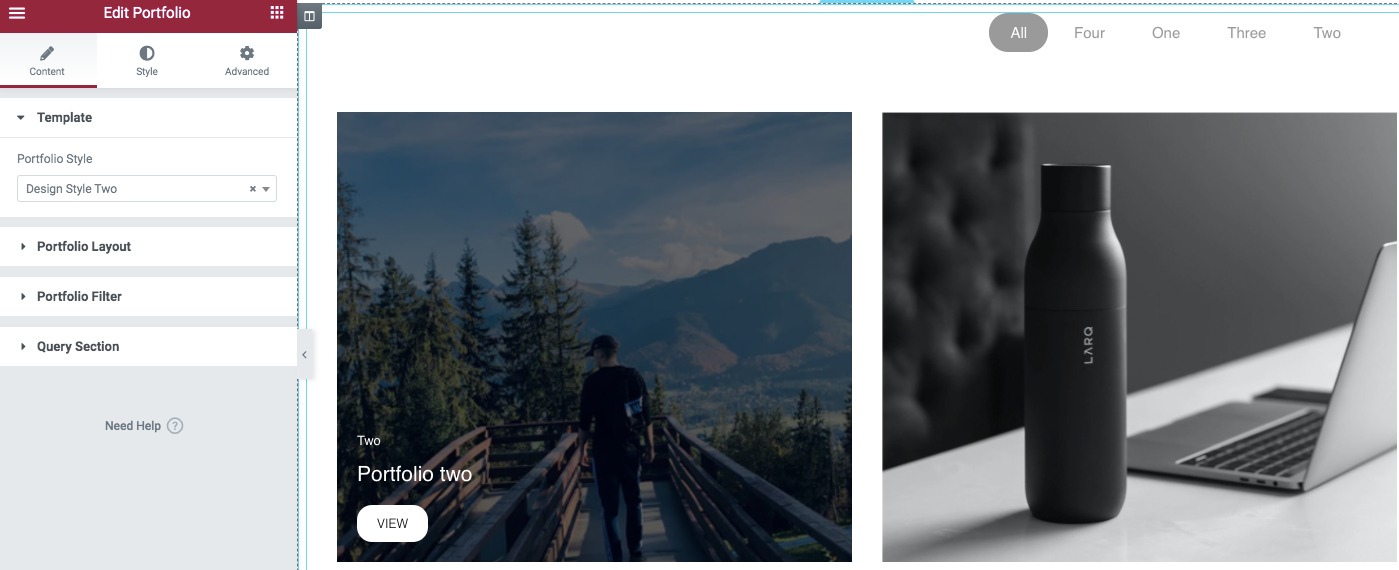
Open up a page with Elementor editor and create a section by clicking on the “+” icon on Elementor and then from the block section of the left bar search for portfolio block. Drag the portfolio block and drop it into your created section.

This will add all your created portfolio items here. Now from the Template menu under the Content tab, you can select the portfolio style. As we mentioned earlier there are ten different styles available. All the styles are not available for the free version. But the free version styles can also fulfill your need in the portfolio section.
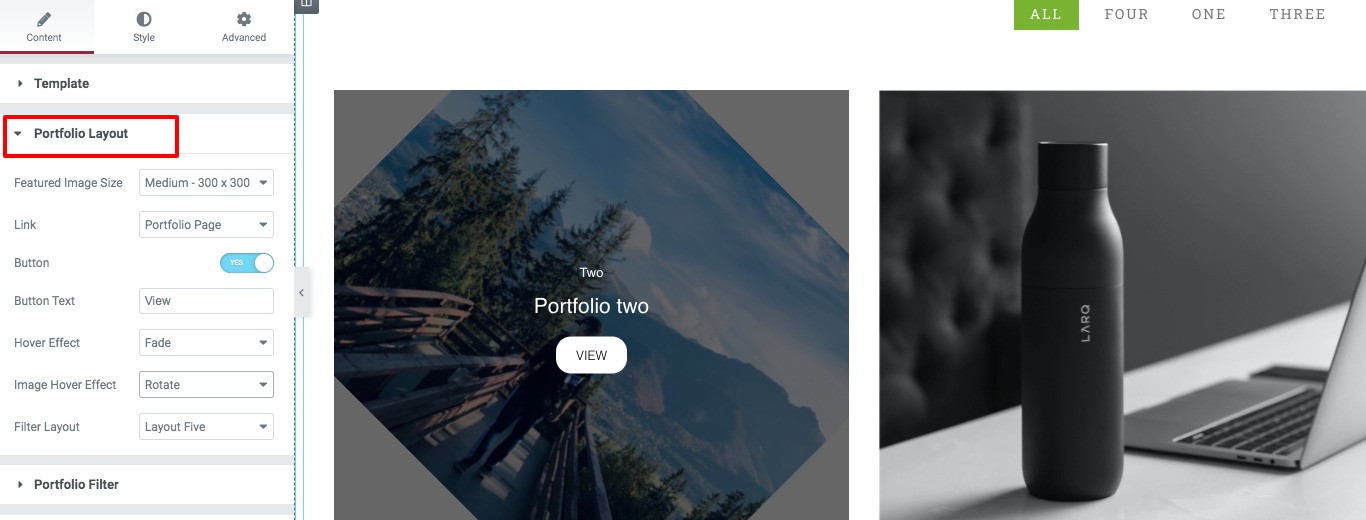
Portfolio Layout
From here you can select the featured image size, set the image link, and enable or disable the button. You can also select the hover effect for text and image. There are different hover effects available. You can also set the filter layout too.
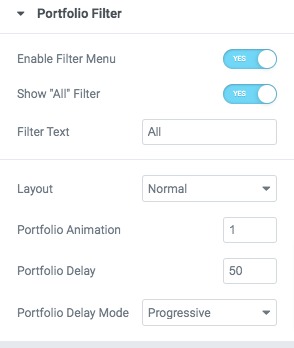
Portfolio Filter
From here you can enable or disable the filter menu and add filter text. After that set the layout, portfolio animation, delay time, and portfolio delay mode.
Query Section
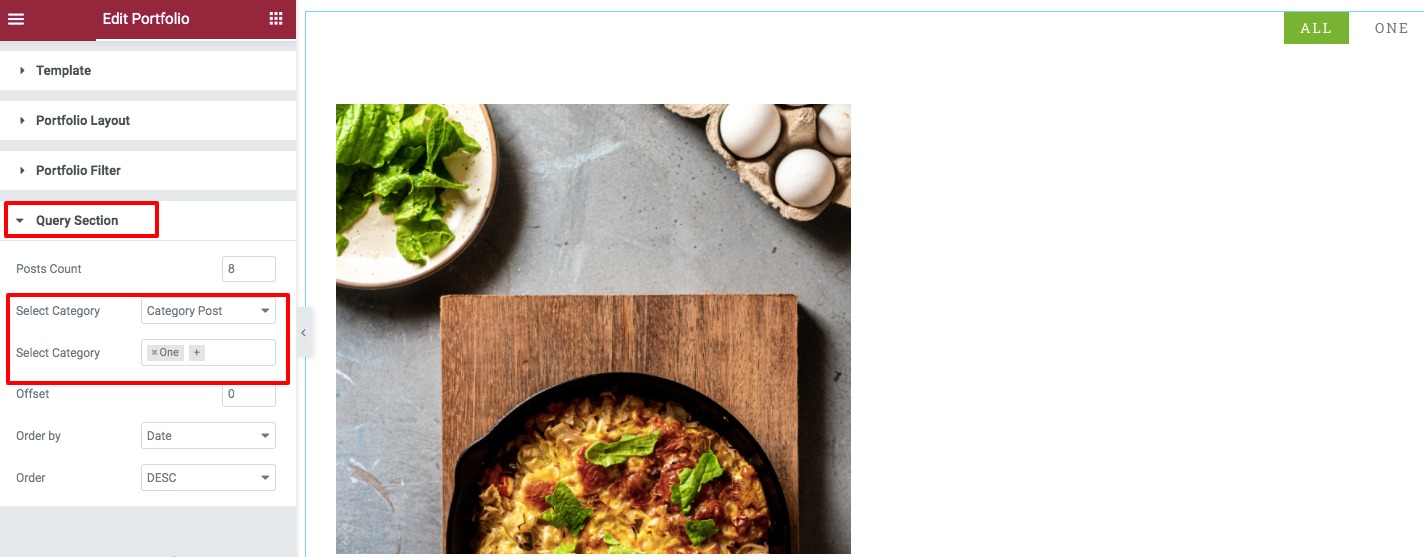
From the query, section set the post count and select the post to display in the portfolio section. There are also different options to display the portfolio.
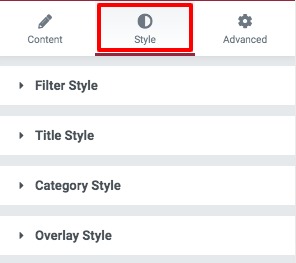
Now move on to the style tab where you will find different style options.
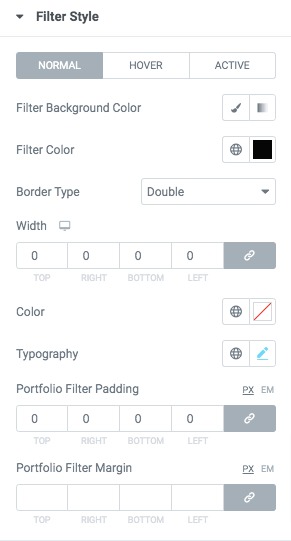
Filter Style
From filter style option filter background-color, filter color, border type, typography, padding, and margin for normal, hover, active condition.
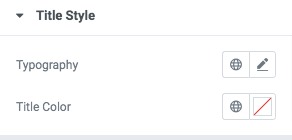
Title Style
Add title typography and title color from here.
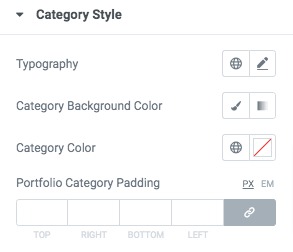
Category Style
Add category typography, background color, category color, and padding grom this option.
Overlay style
Add overly category background color from here.

That’s it! your portfolio section is ready. There are different presets available for the portfolio widget. You can see all the presets demo from here.
Wrapping Up
Following the process, you will be able to create a portfolio section with Elementor for your WordPress website. You can see our other articles to learn How to integrate Mailchimp with Elementor free
How to set the Accordion widget closed by default in Elementor
How to add two buttons in Elementor side by side in the same column
We hope this article will help you. If you like this article please like our Facebook page to stay connected.


