
A complete guide for Elementor column
Are you looking for a complete guide to the Elementor column?
Columns are one of the basic layouts of any website page. If you want to make a webpage perfect, you need to use the column layout properly. With the Elementor page builder, you can easily use the column to make the page perfect. In Elementor all the widgets and blocks are placed inside the column. So in every section, you need to add at least one column to add content. Without adding a column, you won’t be able to add a widget in Elementor.
When you add multiple widgets in one section, you need to use multiple. Columns also play an important role in making your website responsive.
So here in this article, we will discuss the column layout of Elementor and provide a complete guide for the Elementor column. It will help you to add and style the column easily and properly.
A complete guide for the Elementor column
So first let’s take a look at how to add columns and access column settings. To add a column first, open up a page with the Elementor editor and then create a section by clicking on the “+” icon.

Now you have the option to choose the column. There are 1-12 column opinions available. Based on your design, you can choose the column for your section.
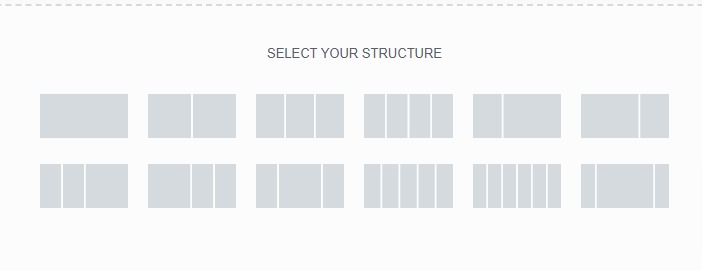
Now your selected column is added to your section. Now you can access the column settings by clicking on the column edit icon. Place the mouse course on the column and you will be able to see the column edit icon on the left top side of the column.

You can also access the column by right-clicking on the column and selecting the edit column option.
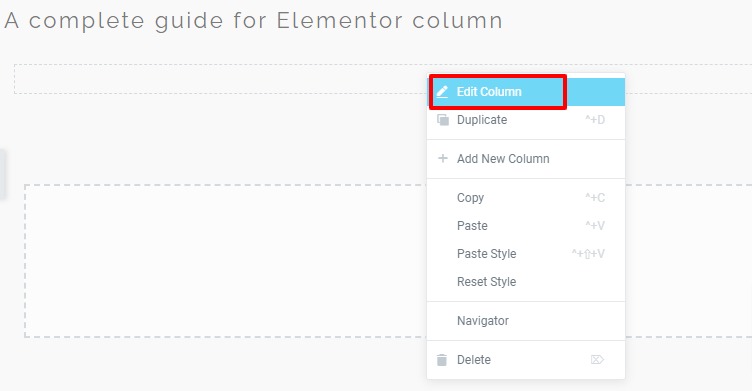
Now from the left dashboard, you can see the settings for the column. From the content tab, you can add column width. Column width is dependent on your column number. If you select 2 columns then each column has a 50% width.
From the column width, you can define the space of each column. You can divide the 100% width for each column as you want. You can set 50% for the first column, 20 % for the second, and the last one gets 30%. It will depend on your design.
You can also add different column widths for different devices. There is a device icon for where you can choose the device like desktop, tablet, or mobile and add column width for a specific device.

Now you can add vertical-align, horizontal align, and weight space for desktop, tablet, and mobile devices.
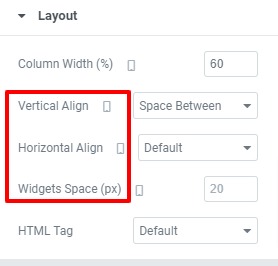
Widgets space will help you when you have multiple widgets in your column. Widgets space will help you to add a common space between all the widgets. If you add 5px widgets space then all the widgets will have 5 px space between them.
HTML tag will give a tag to the column.
Move column
After creating and adding a widget in a column, you can move it easily. Hover over the column and you will see the icon on the top bar.

Now drag the column and drop it to move the column.
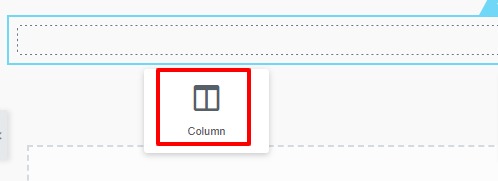
You can move the column to any section of the page.
How to delete a column
If you want to delete a column, you need to right-click on that column and then click on the delete column option.
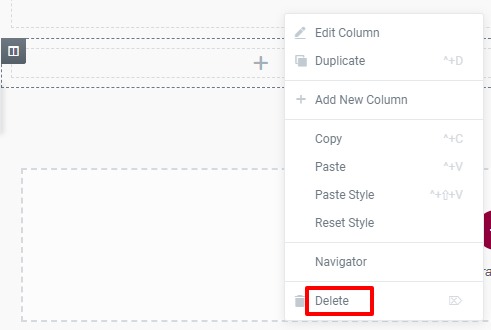
If you have multiple columns in a section and delete a column, then the other columns will realign the width value. Suppose there are two columns with 50% width and delete one column. Then the next column will have 100% width.
Create a column inside a column
To add a column inside a column you need to use the inner section widgets. Inner section widgets will enable you to create a column inside a column. In a single column, you can use multiple columns using the inner section.
To add an inner section, click on the plus icon inside the column and then from the left dashboard drag the inner section widgets and drop it into the column. It will create a column inside your column.

Display the navigator option and then you can see the structure more clearly.
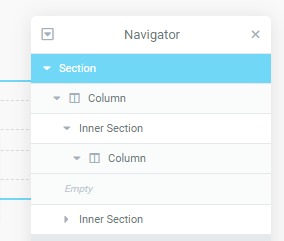
Here we have a column and then an inner section under the column, and again a column under the inner section.
Wrapping Up
We hope this article will help you. You can see our other article to learn How to create an image grid in Elementor.
How to Fix Elementor Stuck on Loading Screen Issue
If you liked this article, please like our Facebook page to stay connected.


