
How to Open an Elementor Popup in Gutenberg
Looking for a way to open an Elementor Popup in Gutenberg? Popups can play a very important role if you created it in a way that your users don’t feel annoyed. Many people think that popups can distract your users but if your popup is creative it can attract the users too.
Creating a popup using the Elementor page builder is very easy. You can easily create beautiful popups and place them anywhere on your website. If you want to display popups on your website’s blog posts then the popup needs to open on Gutenberg editor. So here in this article, we will guide you to the easiest way to open an Elementor popup in Gutenberg.
Creating popup with Elementor
Before creating your popup make sure that you have upgraded to Elementor Pro as the popup builder feature is not available on the free version of Elementor. You need to set actions and conditions to display the popup on your web pages. Before creating your popup you need to set the action and popup context. Here you will create a banner on a button so that when a user clicks on the button the call to action shows up as a popup.
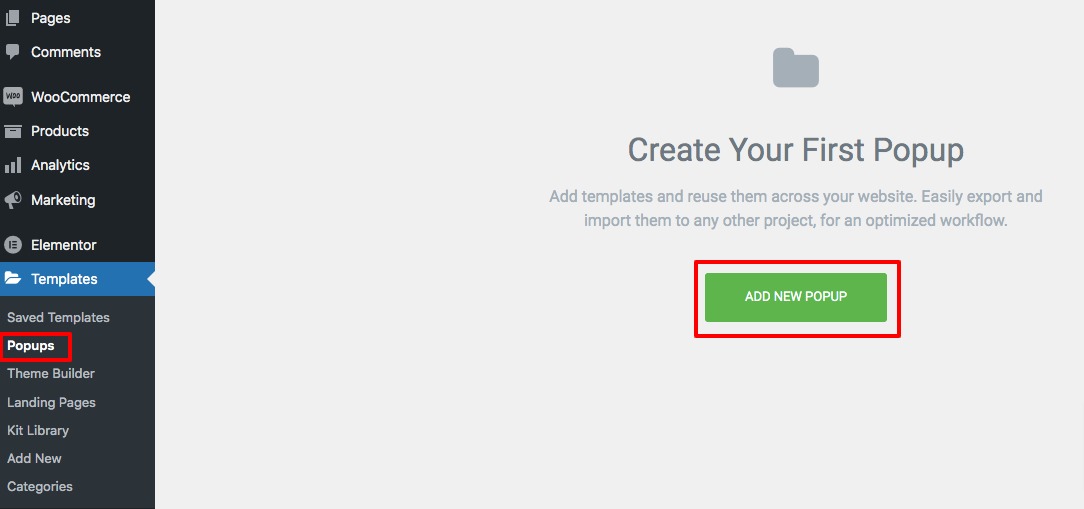
Login to your WordPress website and navigate to the Templates > Popup page and click on the Add New popup button.
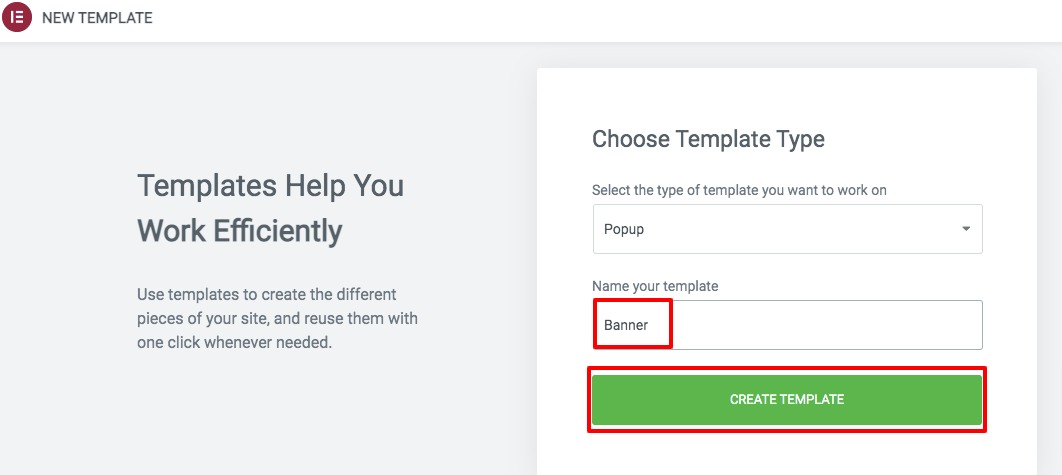
Now you need to add a name for the popup and then click on the Create Template option.
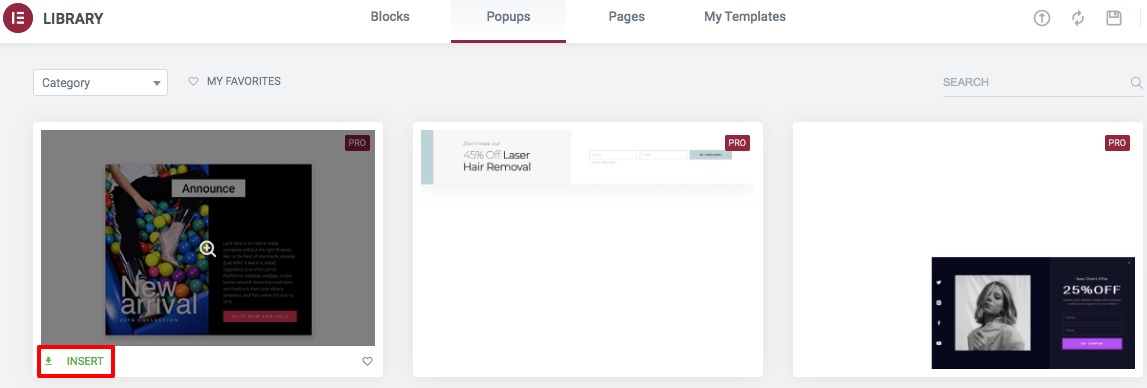
It will show you the premade popup, you just need to click on the Insert button of a template to add.
If you want to create the popup from scratch then just close the library and design the page as your own. When you are done click on the publish button.
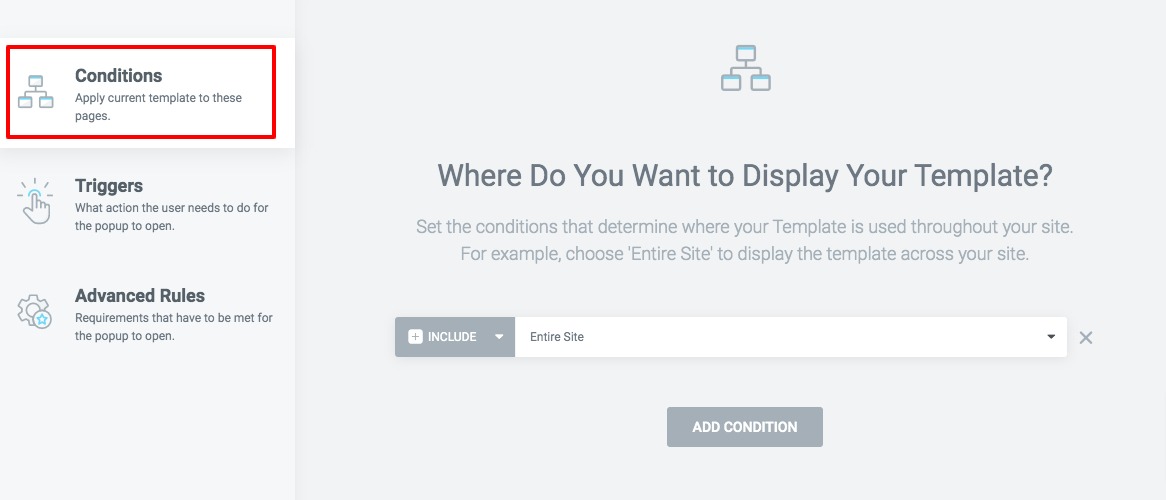
Now you need to set the conditions, triggers, and advanced rules to display the popup.
Conditions
Here you need to set where the popup template is used throughout your website. If you want to display the popup banner all over your website then you need to select Entire Site. You can also include and exclude the different areas of your website to show or hide the popup.
Triggers
Here you need to set what action the user needs to do to display the popup. You can set the trigger on page load with a duration. You can also set the trigger on a scroll or on a click. There are many more trigger options available. You need to enable and set conditions on it.

Advanced Rules
here you need to set the requirements that have to meet to open the popup. The requirements are –
- Show after X page views
- Show after X session
- Show up to X times
- When arriving from a specific URL
- Hide for logged-in user
- Show on devices
- Show on browsers
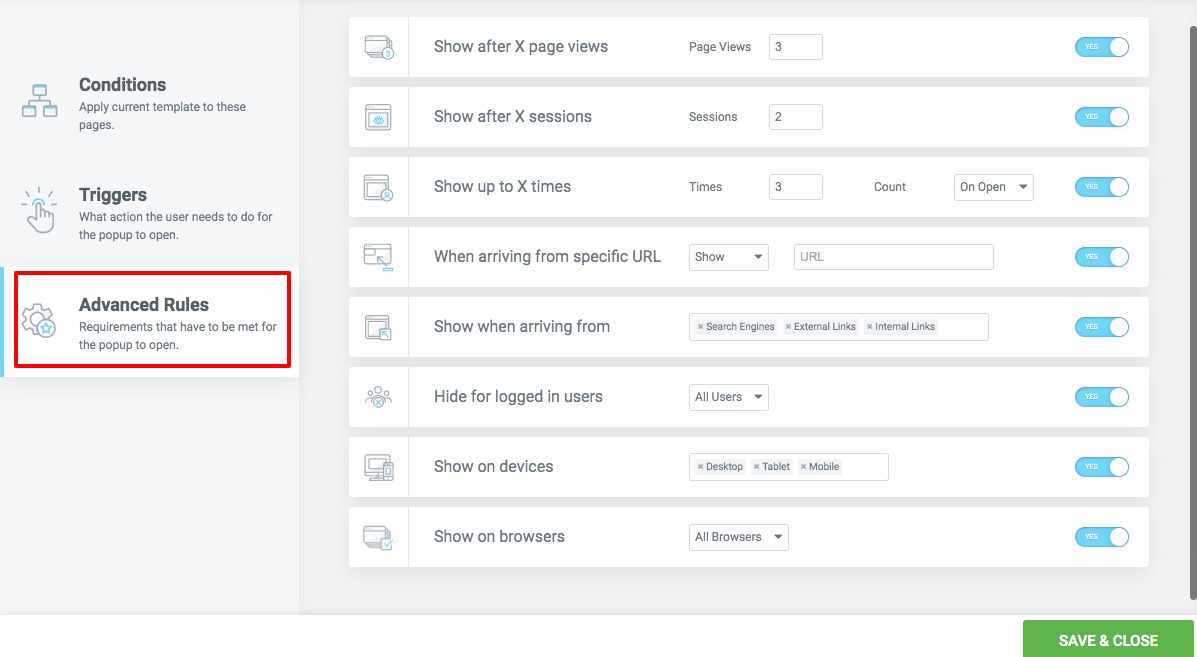
When you are done click on the Save & Close button. That’s it! your popup is live now and when a user fulfills any of the criteria you set the popup will show up.
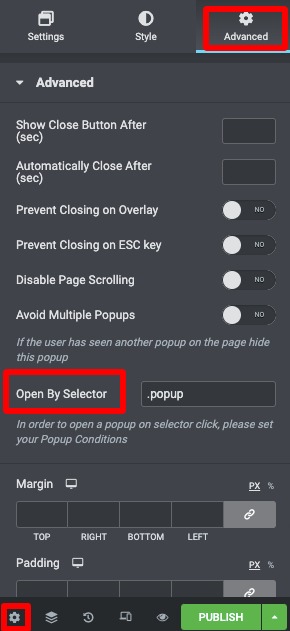
After creating your popup click on the gear icon at the bottom left of the Elementor editor panel and navigate to the Advanced tab. Now add a selector on the Open by Selector field. Don’t forget to add the dot symbol as a prefix.
Open the popup in Gutenberg
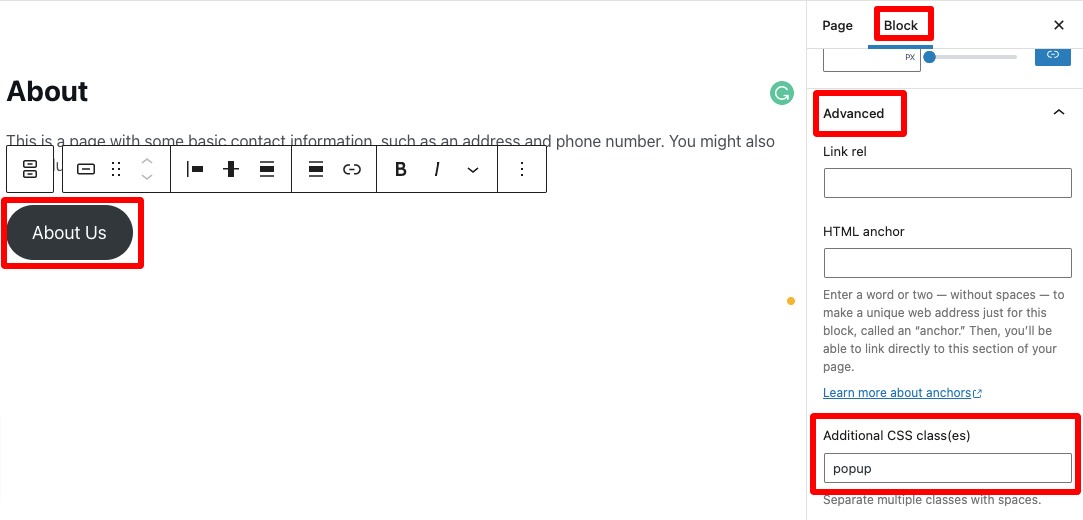
After creating your popup with Elementor it’s time to open it on the Gutenberg WordPress editor. Open up a post or page with the Gutenberg editor and select or create new content. Now you need to choose the block where you want to show the popup. Here we will use the button block as a popup trigger. When a user clicks on the button the popup will show up.
Click on the button block and from the right editing panel, go to Block > Advanced option. Now in the Additional CSS Class field add the popup selector value.
That’s it update or publish your page and it will apply the popup on the button.
Wrapping up
Following the process, you will be able to open an Elementor popup with the Gutenberg WordPress editor. You can see our other article to learn Gutenberg vs Elementor everything you need to know
How to use Elementor blocks for Gutenberg editor
How to create a rounded image in Gutenberg
We hope this article will help you. If you like this article please like our Facebook page to stay connected.


