How to fix “Preview could not be loaded” error in Elementor
Are you facing the “Preview could not be loaded” Elementor error on your website and don’t know what to do? Don’t worry you are at the right place. This article will guide you to the easiest way to fix the “Preview could not be loaded” error on your Elementor website.
Elementor is one of the best page builders with many advanced features and functionalities. With greater features, you may face some bugs and errors while creating your website. Elementor has some common bugs and “Preview could not be loaded” is one of them. If you are a beginner then this might look frustrating as the error doesn’t provide you any information to solve it. So let’s see how you can fix the preview that could not be loaded error easily.
Fix the “Preview could not be loaded” error in Elementor
Enable safe mode
When you face this error the first thing you need to do is to enable the safe mode. Safe mode will help you to troubleshoot the problem of your website. when you are enabling the safe mode it will separate the Elementor and WordPress from other themes and plugins of your website. So you can easily troubleshoot the reason for the error.
To enable the safe mode go to Elementor > Tools page and select the Enable option from the safe mode dropdown.
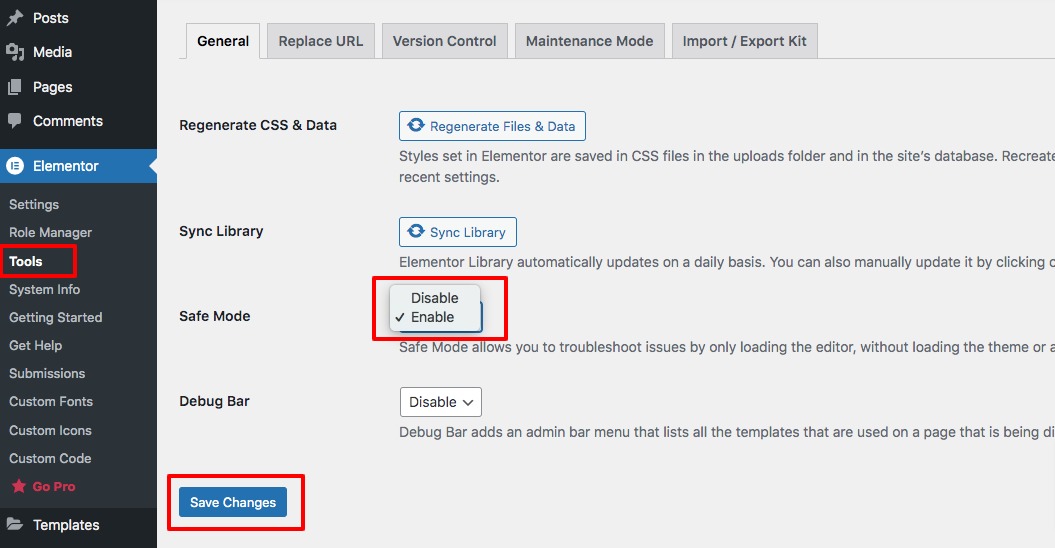
Click on the Save Changes button to save your changes.
Check the theme file
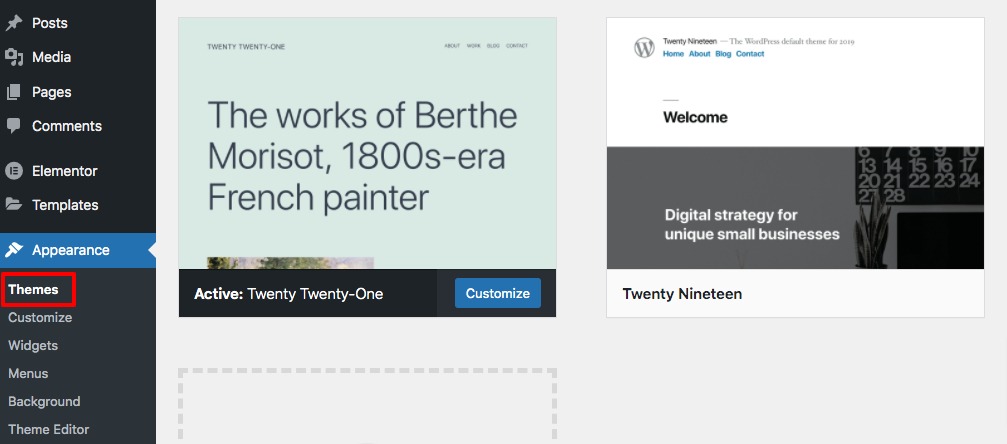
If there is no theme available on your website then you need to install a theme or reinstall the current theme. If there is no theme available then you may face the preview could not be loaded error. You can check your website’s active from the Appearance > Themes page.
Deactivate all plugins
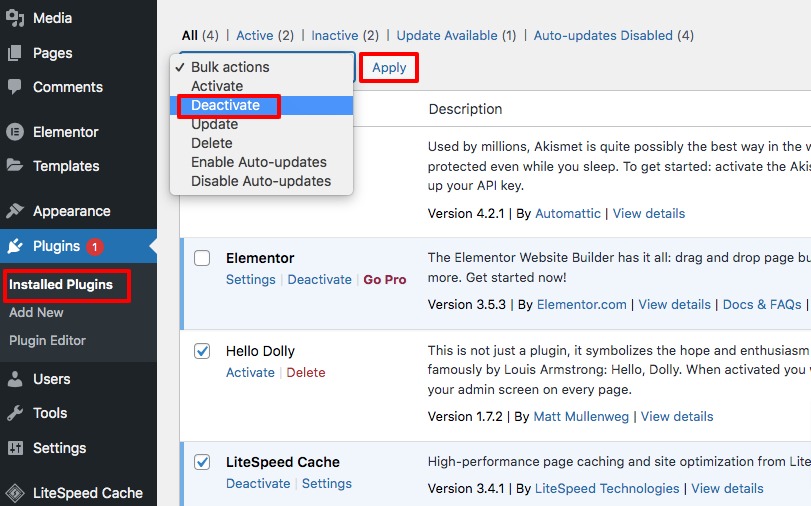
You need to deactivate all the plugins except the Elementor and check if the error is solved or not. If the error is solved then one of your plugins causing the issue. Activate the plugins one by one and check which one causing the issue. When you find the corrupt plugin delete it or contact the author about the issue.
To delete all the plugins go to the Plugins > All Plugins page and mark all the plugins except the Elementor and Elementor Pro. Now use the bulk option dropdown and select the deactivate option. After that click on the Apply button. It will deactivate all your selected plugins at once.
Switch back to a default theme
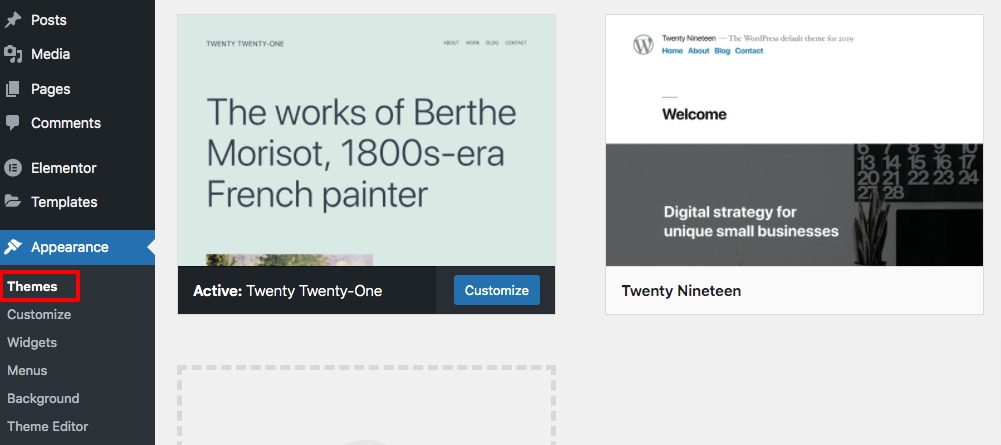
If the plugin conflict is not responsible then you need to switch back to a default WordPress theme. If the problem is solved then your theme is the reason. So you need to change the theme. To switch back to the default theme go to the Appearance > Themes page. From this page activate any of the default WordPress themes like Twenty Twenty-One.
Check on the browser in incognito mode
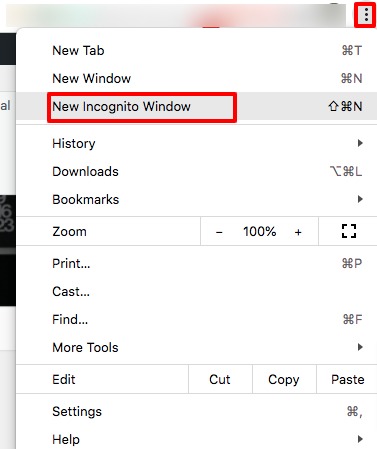
Sometimes browser addons or cache cause the error so you need to check the issue on your browser incognito mode. Make sure that no add-ons are running in the incognito mode. You can open the incognito mode on your Google Chrome using the three dots option in the top right corner. Click on it and then select the incognito option.
Check permalink
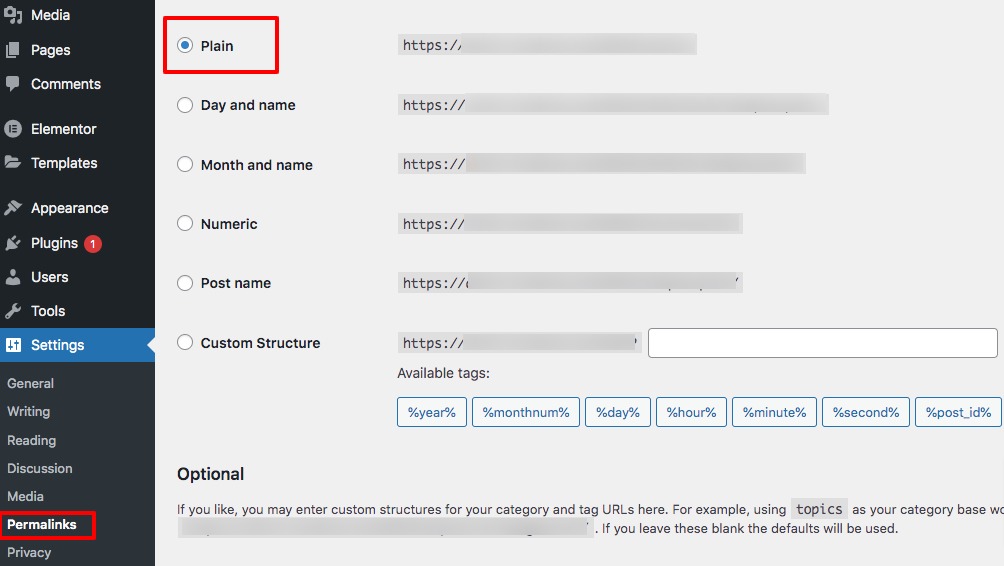
You need to check your website permalink once again. There is some server that does not allow write access to the .htaccess file. So you need to set the permalink structure as Plain. To set your permalink go to the Settings > Permalink page and select Plain. Click on the Save Changes button to save your changes.
If you are receiving 500 internal server errors on your Elementor website, click here for the debug procedure.
Wrapping Up
Following the process, you will be able to fix the “Preview could not be loaded” error in Elementor. You can see our other articles to learn How to fix changes not visible in the Elementor error
How to fix the Publish/Update button not working error in Elementor
How to fix Elementor blank page error
We hope this article will help you. If you like this article, please like our Facebook page to stay connected.



Comment