How to add an image into a text in Elementor
Do you want to add an image into a text in Elementor? Here in this article, we will guide you to add an image into a text in Elementor. Using Elementor you can easily add different styles to your website without having any coding knowledge. You can use the visual editor to create any design without advanced CSS and HTML knowledge. Elementor provides a wide range of widgets for your need. With the visual editor if you have some CSS knowledge then you can do a lot more amazing things.
You can use the custom CSS features to add more styles to your web pages. Adding images into a text can add your website heading different from others. In Photoshop you can do this by adding a layer but for your website, you need to add a few lines of CSS code to add an image to the text. So let’s see how you can add an image into a text in Elementor.
Add an image into a text in Elementor
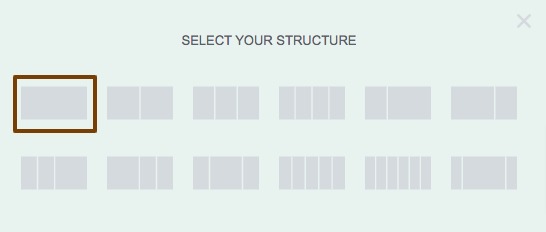
The Custom CSS feature is only available with Elementor pro. So before adding an image into a text you need to upgrade yourself to Elementor Pro. Make sure to enable the Elementor Pro and then open up a page with the Elementor editor where you want to add an image into a text. Now click on the “+” icon to create a section and then choose the column.

Here we are selecting one column for your section.

After creating the section add the Heading widget to your created section.

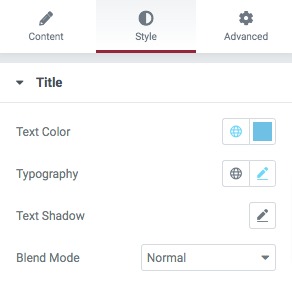
You can change the heading text from the content tab of the widget. Now move on to the Style tab where you will find different style options to style up your text. You can change the text color, text-shadow, and blend mode for the text. From the typography option, you can set the font family, font size, line weight, letter spacing, and many more things.

Now you need to upload the image which you want to add to your selected text. To upload an image go to Media > Add New and then select the image to upload. When your image is uploaded you will be able to see an option to copy the image URL. Copy the image URL and then go back to the Elementor edit page.

Go to the advanced tab of the heading widget where you will find the Custom CSS field. Make sure to upgrade to Elementor Pro otherwise you won’t be able to use the feature. Now in the Custom CSS field add the following code.
selector .elementor-heading-title

{

background: url("https://www.themeoo.com/wp-content/uploads/2021/11/image-into-text.jpeg") yellow repeat 40% 60% ;

-webkit-background-clip:text;

-webkit-text-fill-color:transparent;

}
This will add your selected image to the text.
Wrapping up
Following the process, you will be able to add an image to the text. You can see our other articles to learn How to add business hours to your Elementor website
How to use two different colors on a heading in Elementor
How to set the Accordion widget closed by default in Elementor
We hope this article will help you. If you like this article please like our Facebook page to stay connected.


Comment